Create a Followup Email Sequence
What you'll learn
In this guide, you'll learn how to create a follow-up email sequence from scratch — including triggers, sending schedules, multi-step emails, settings, and how to activate it.
How to Create a Follow-Up Email Sequence
A follow-up sequence automatically sends one or more emails when a specific condition is met — such as when a label is applied to a conversation.
Ideal For
Sales follow-ups
Demo invites and reminders
Cold or warm outreach replies
How It Works
A trigger (like a label being applied) starts the sequence automatically. Each follow-up email sends only if the prospect hasn't replied yet.
Steps:
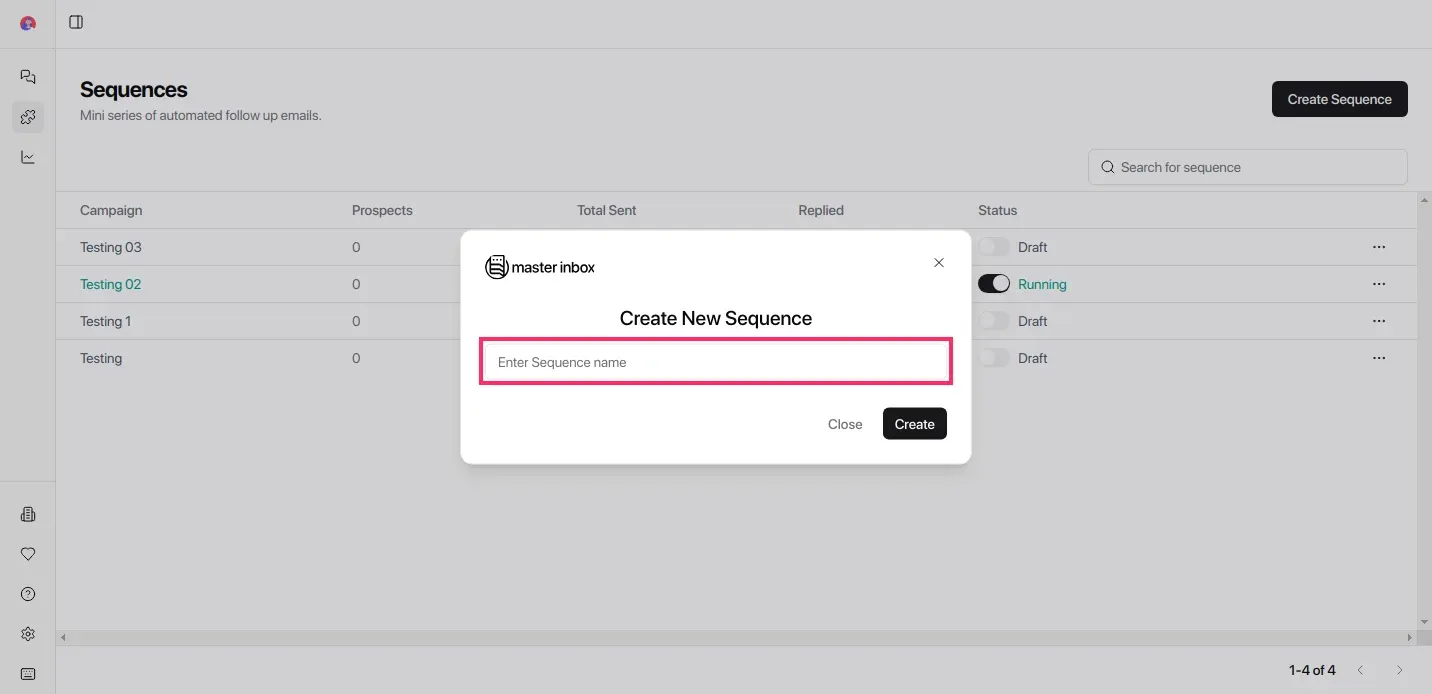
Click Create Sequence icon on the top right side
Click Create Sequence
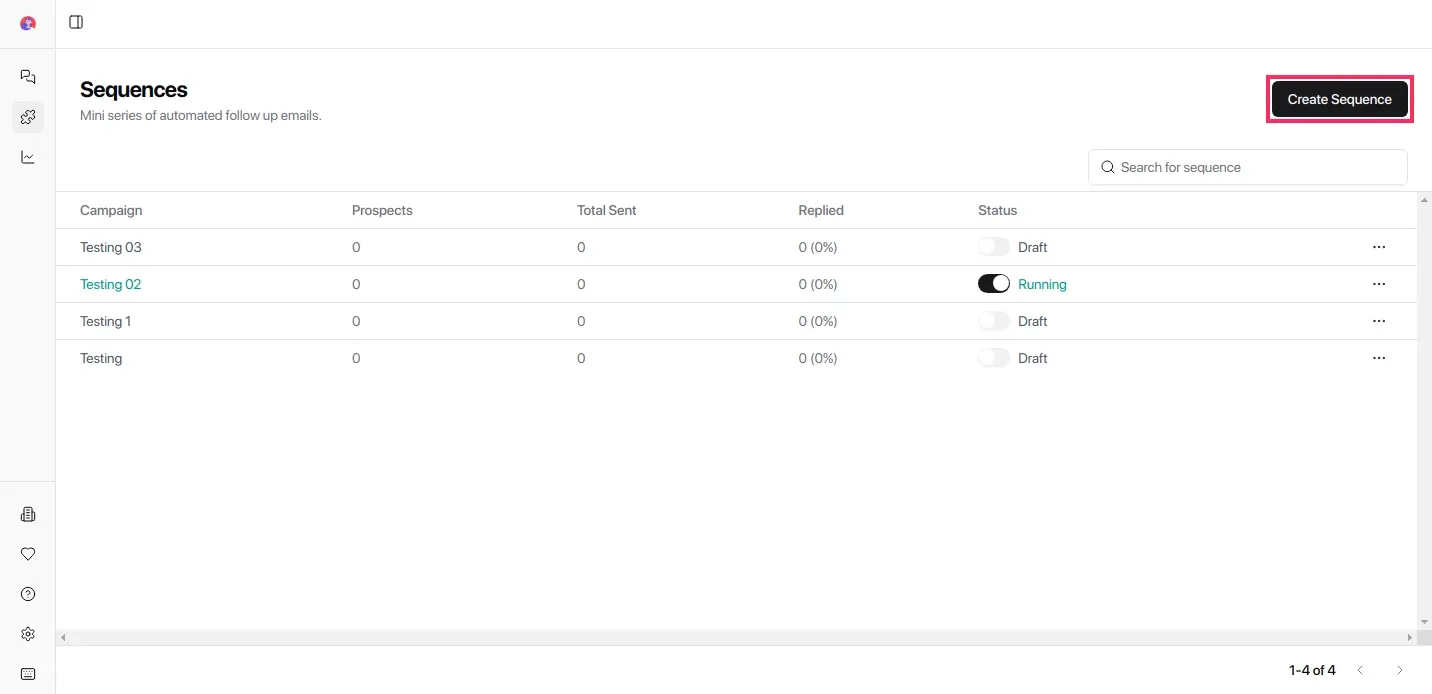
Enter a Sequence Name (e.g. Lead Follow-ups)
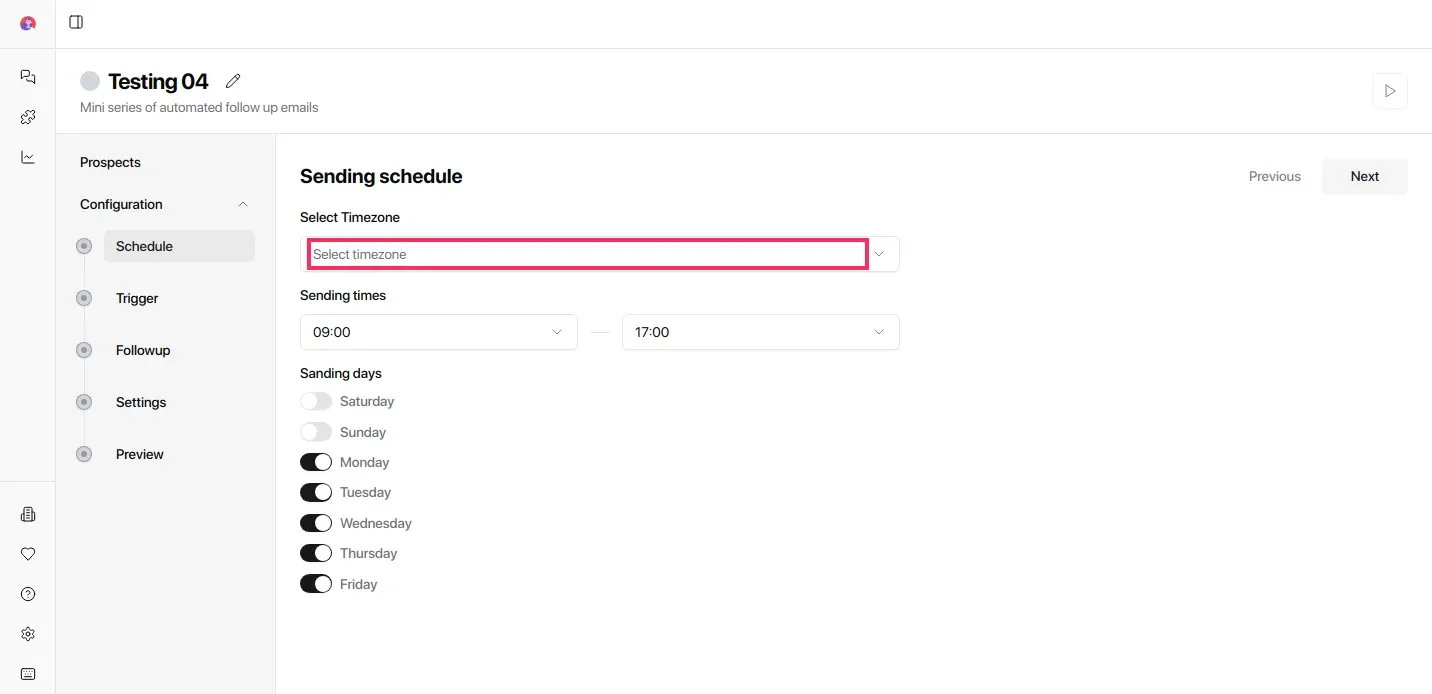
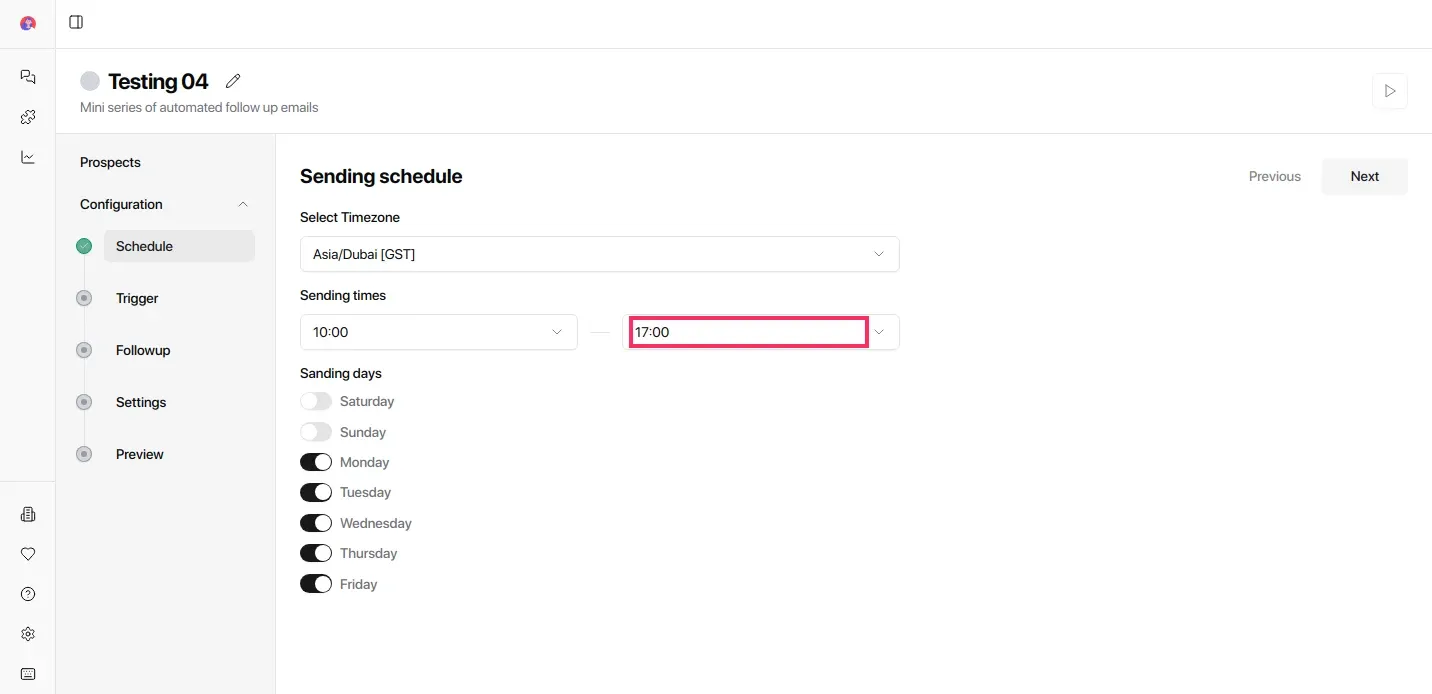
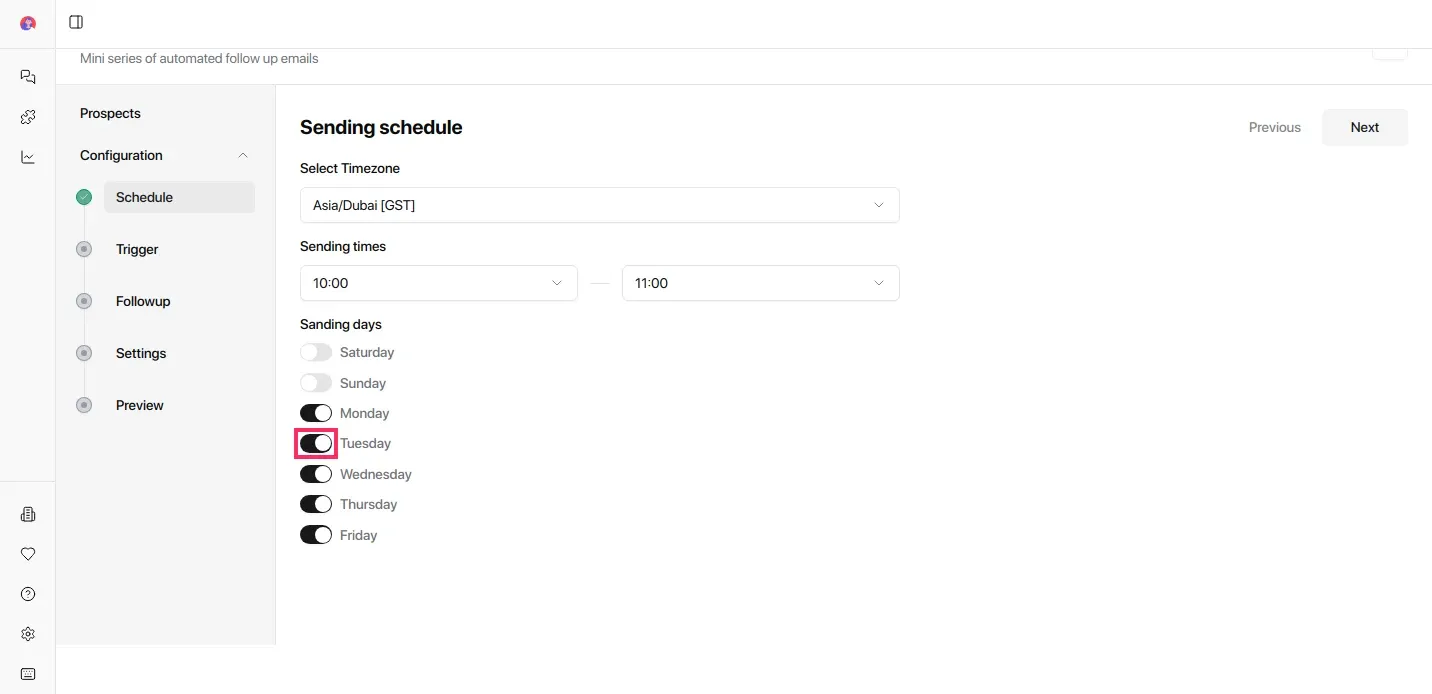
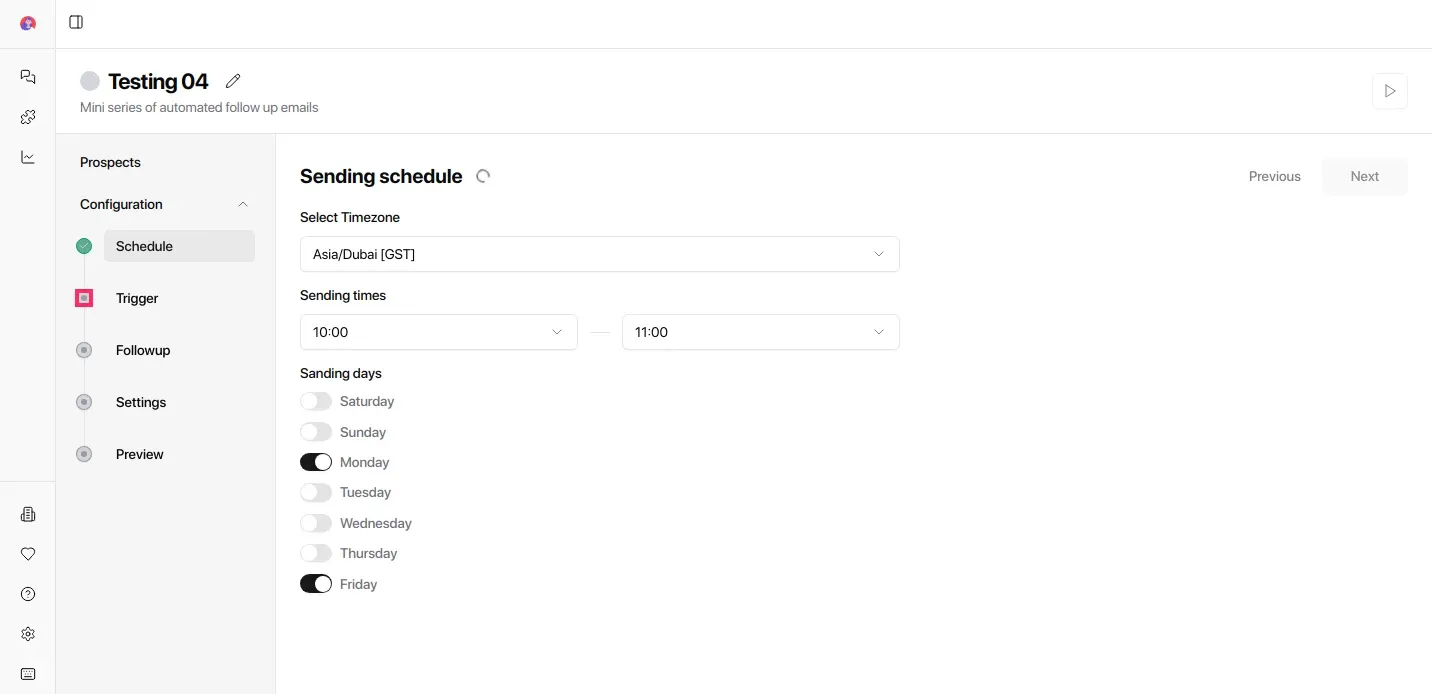
Configure sending schedule
This controls when your emails go out.
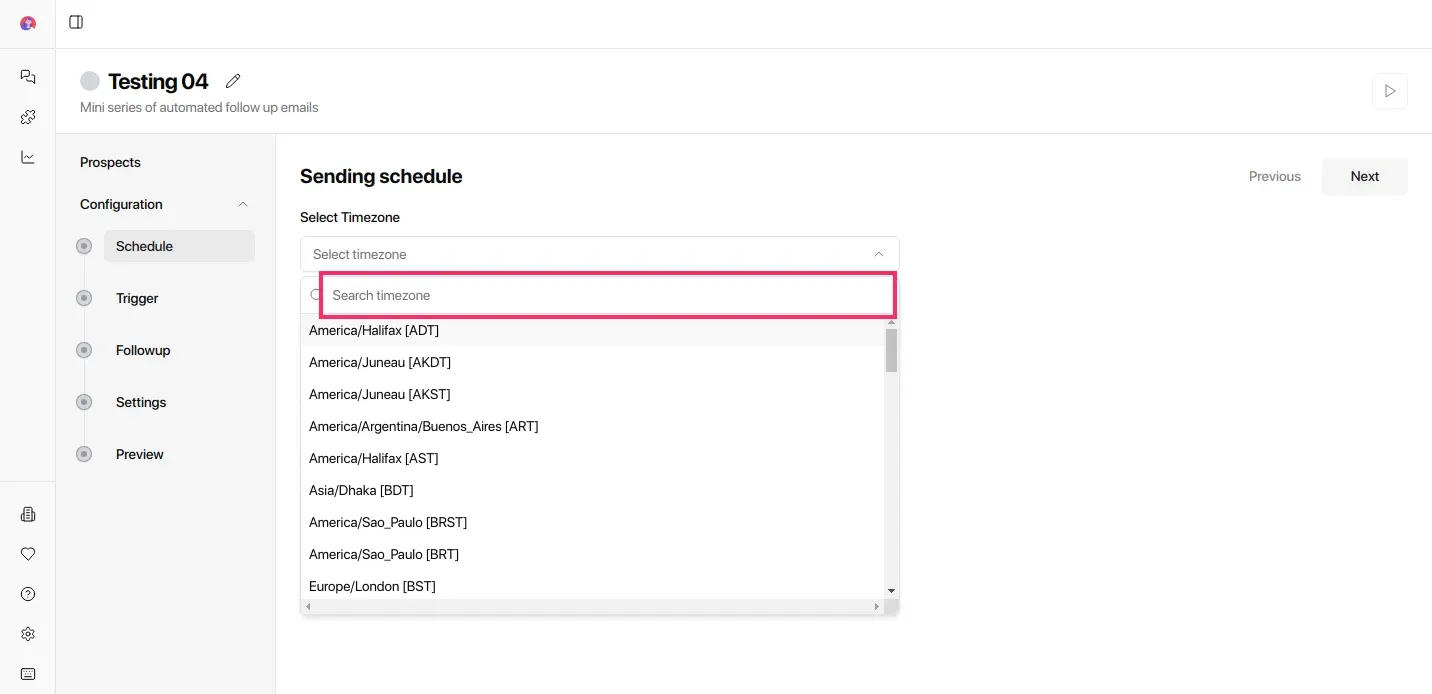
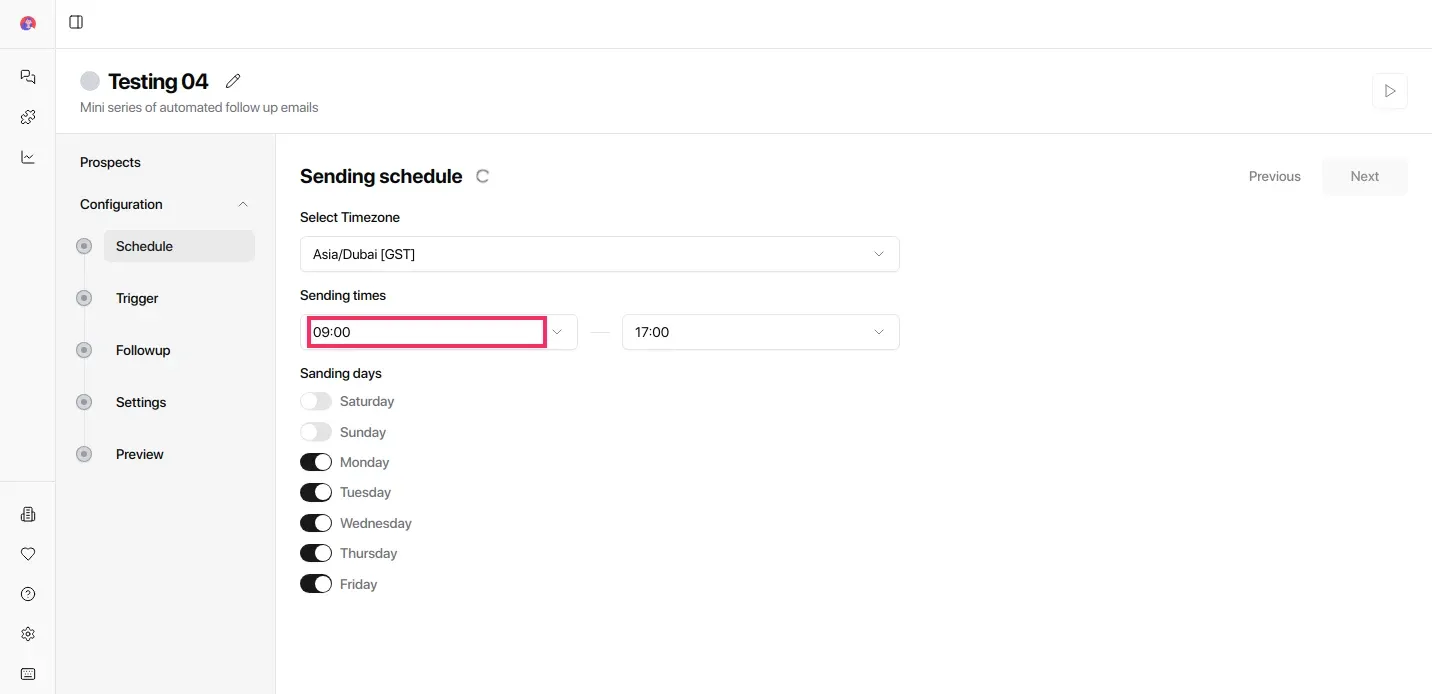
Select a Time-zone
Choose Sending Time (start and end time window)
Select Sending Days (e.g. Tuesday, Thursday)
Match the time zone to your prospects' location for better reply rates. Sending during their working hours significantly improves open and response rates.
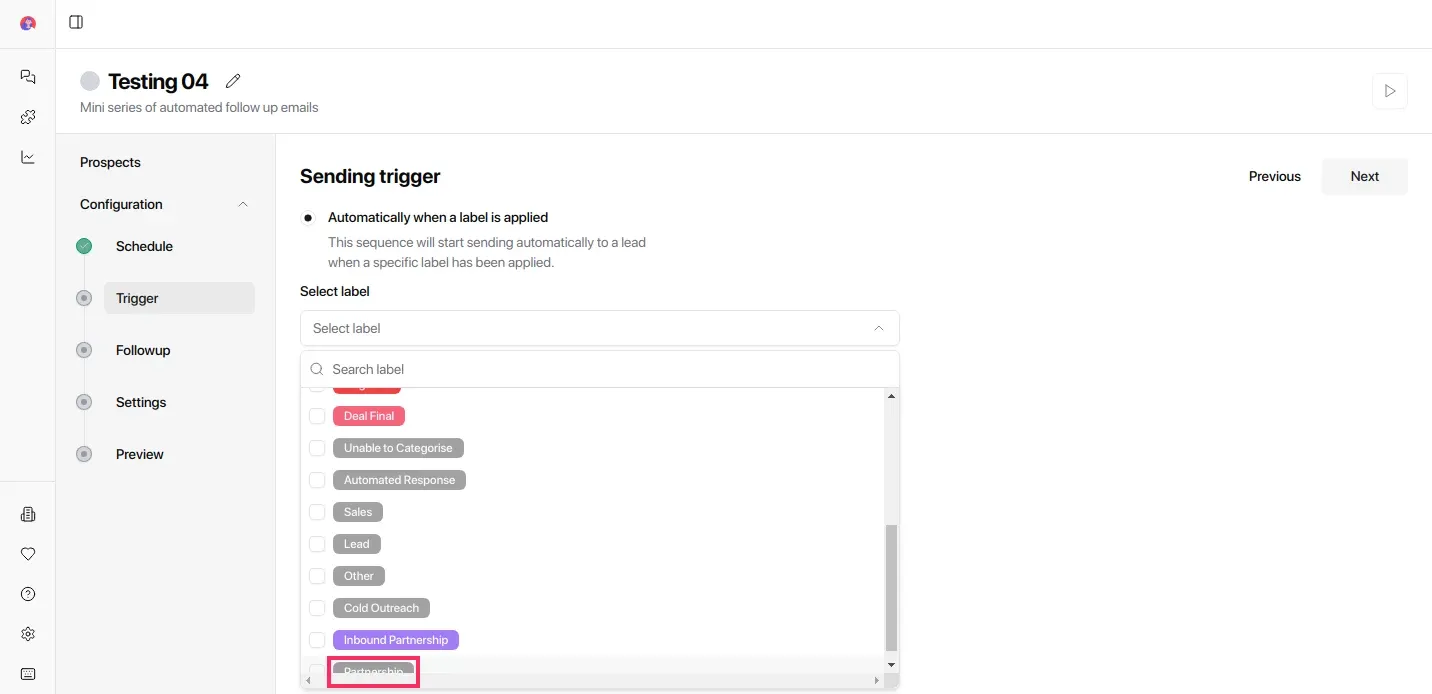
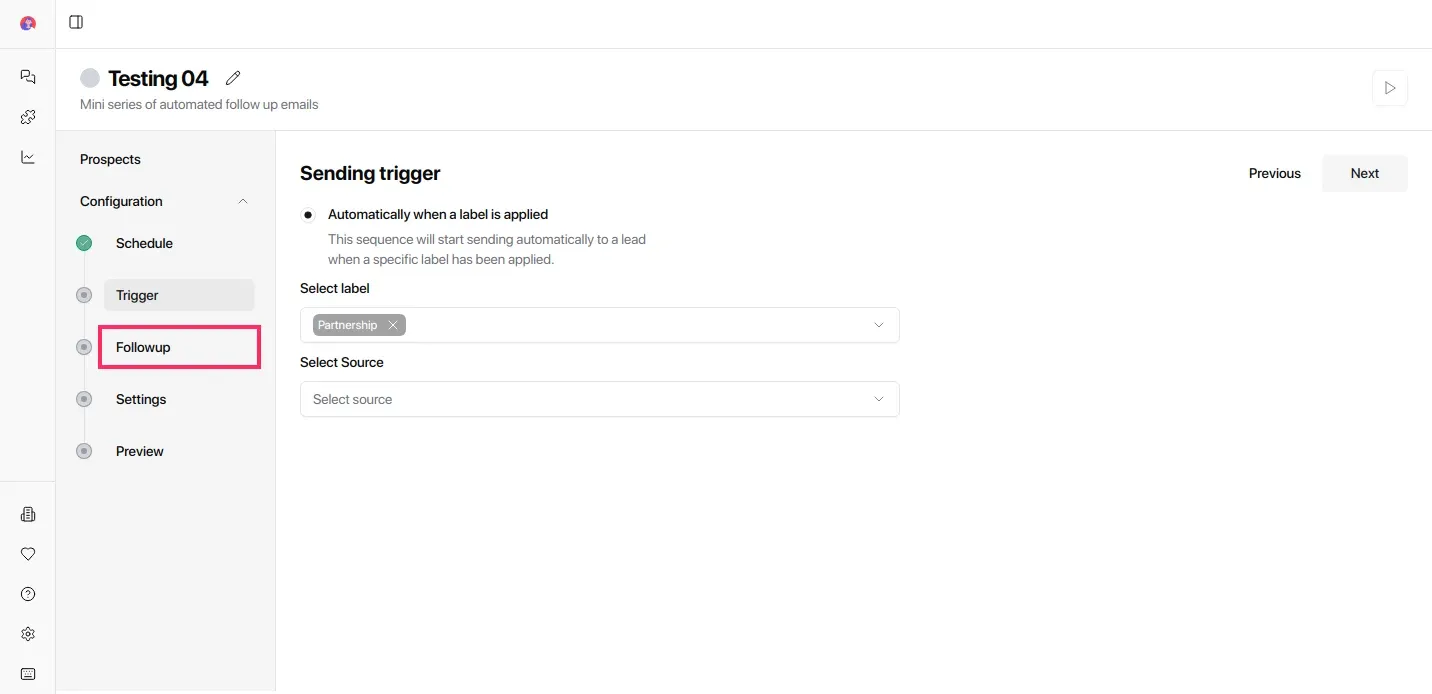
Set a Trigger.
Triggers decide when the sequence starts.
Open Trigger from the left menu
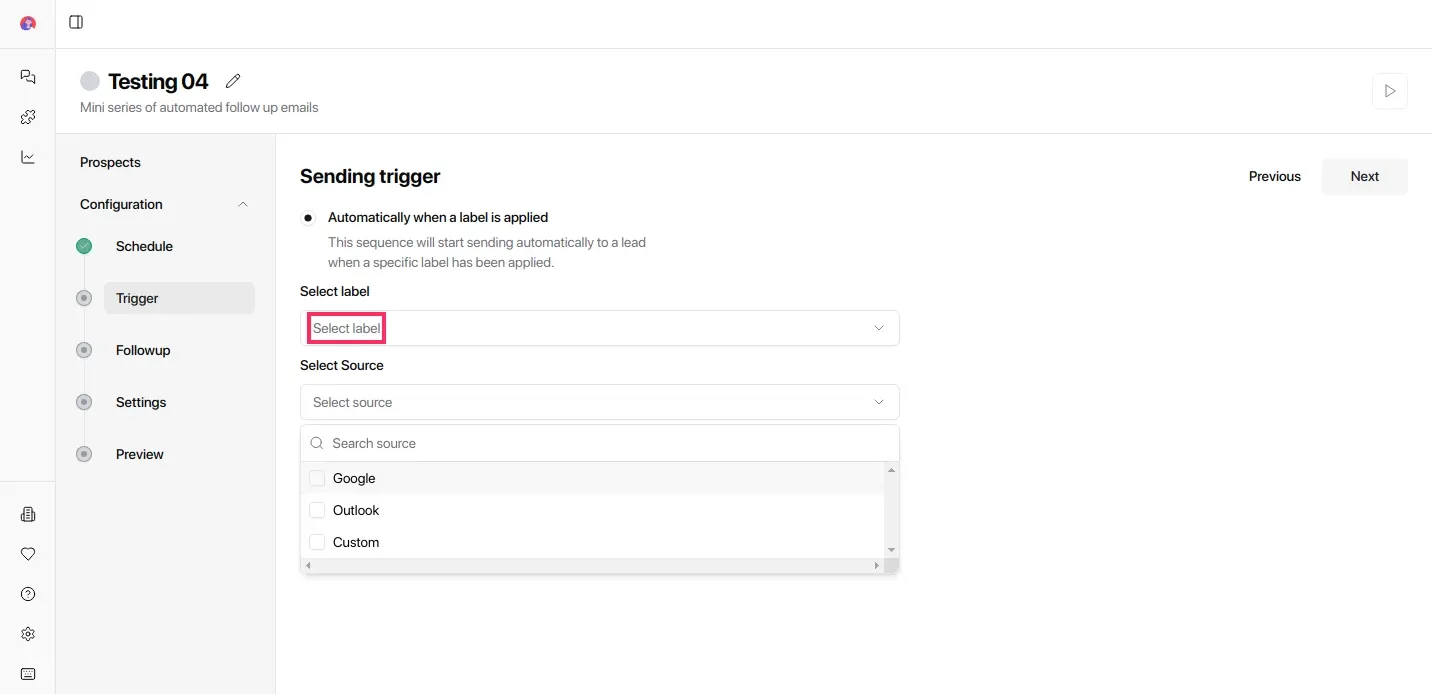
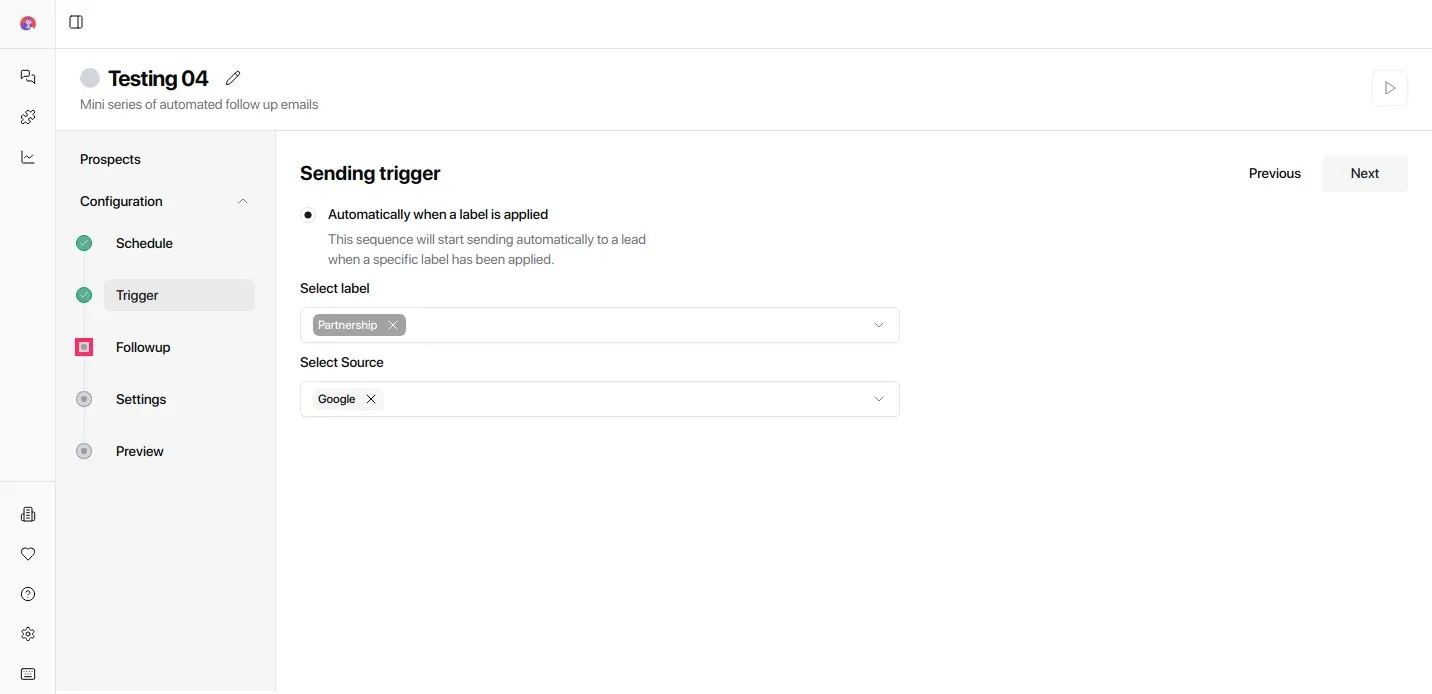
Choose the Label that should start the sequence (e.g. Interested, Lead, Other)
Choose the Source (e.g. Google, Outlook, Custom)
When the selected label is applied to a conversation, the sequence will begin automatically. No manual action needed.
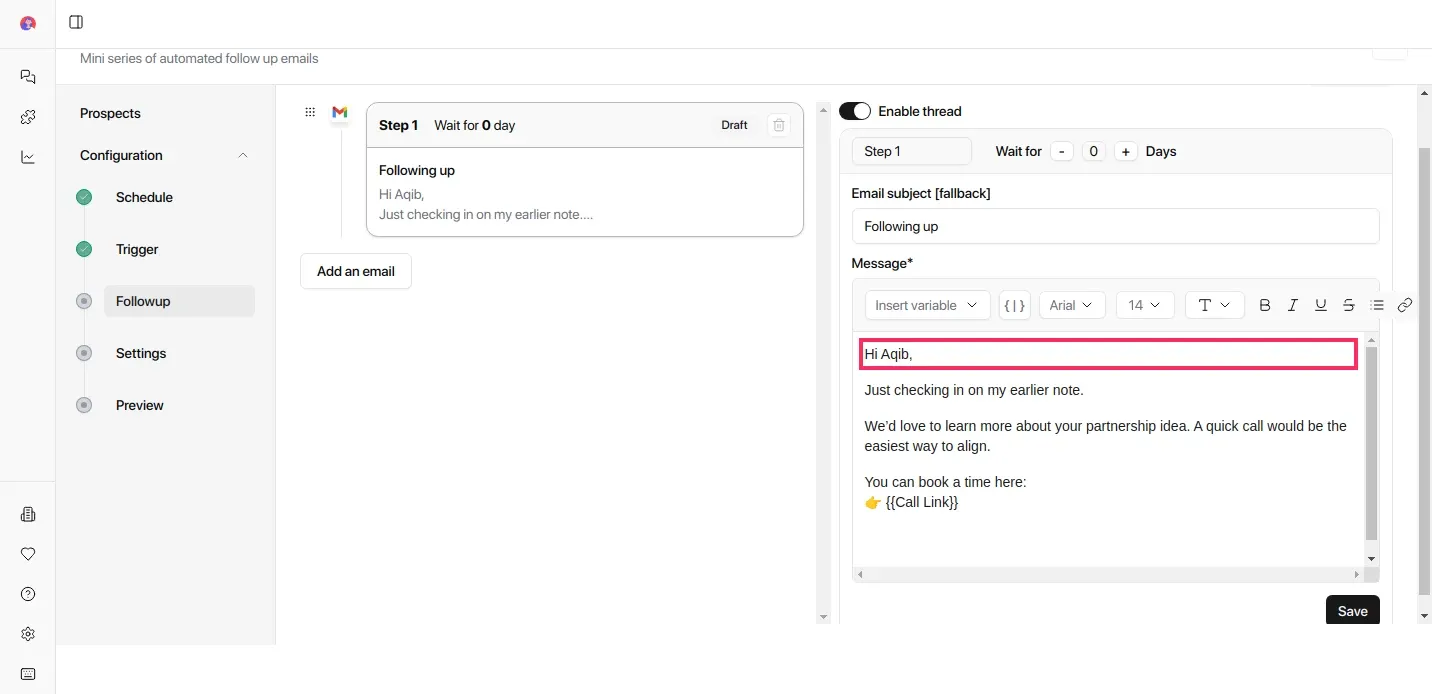
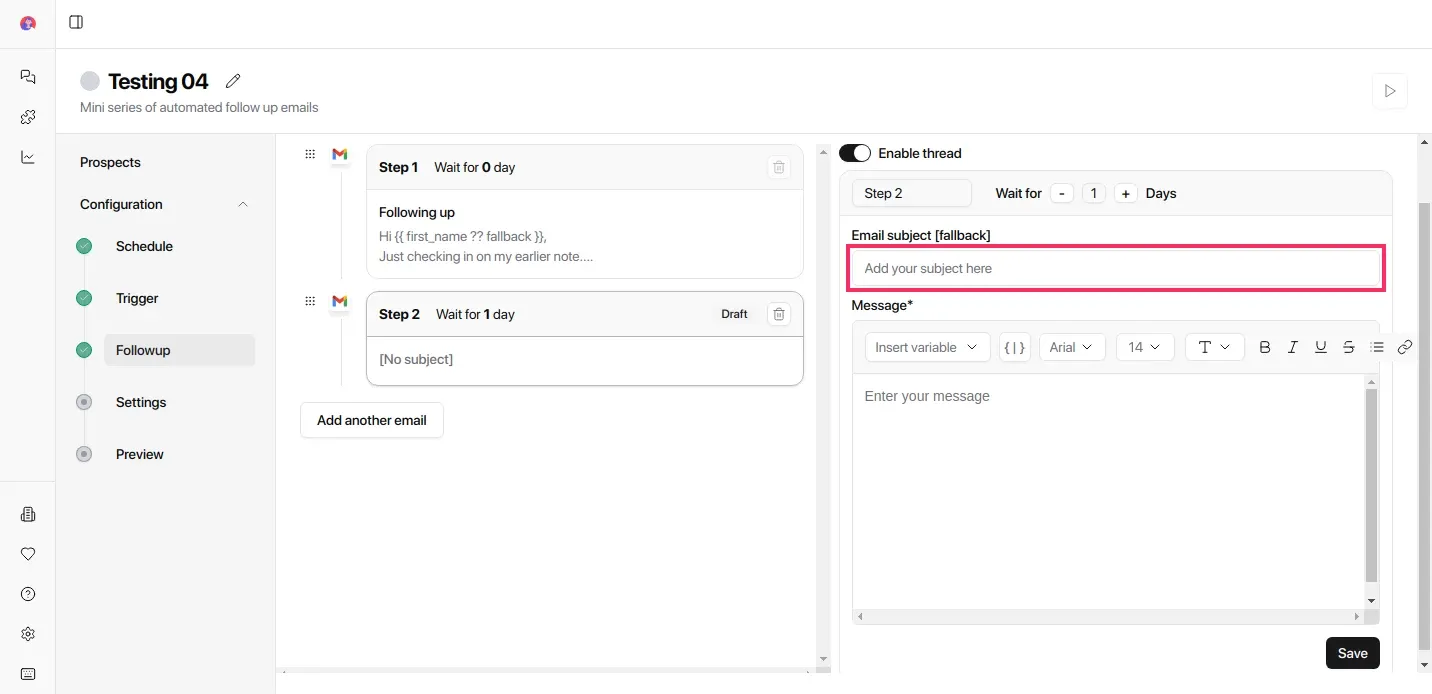
Step 4: Add the First Follow-Up Email
Enter the Email Subject
Write your Message
Insert Variables (e.g. First Name) to personalize the email
Add your Email Signature
Click Save
Add Follow Up info
You can build a multi-step sequence.
Create the first email
Enter a new Subject and Message
Set the number of days to wait before sending this email
Personalize the message using variables (name, company, role, etc.)
Click Save to store the configuration
Each follow-up only sends if the prospect hasn't replied yet. The sequence stops automatically when a reply comes in — unless you configure it otherwise in Settings.


Then Click Add another email and build the sequence with as many emails as you want
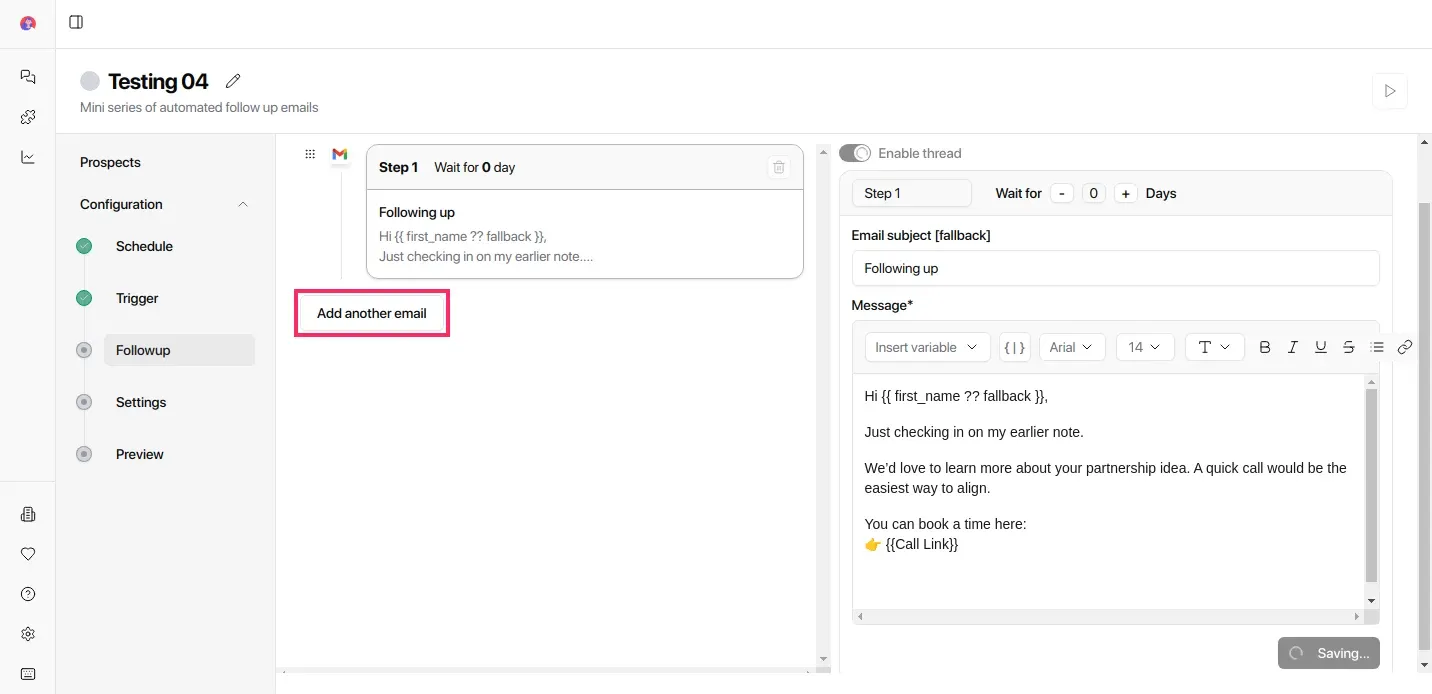
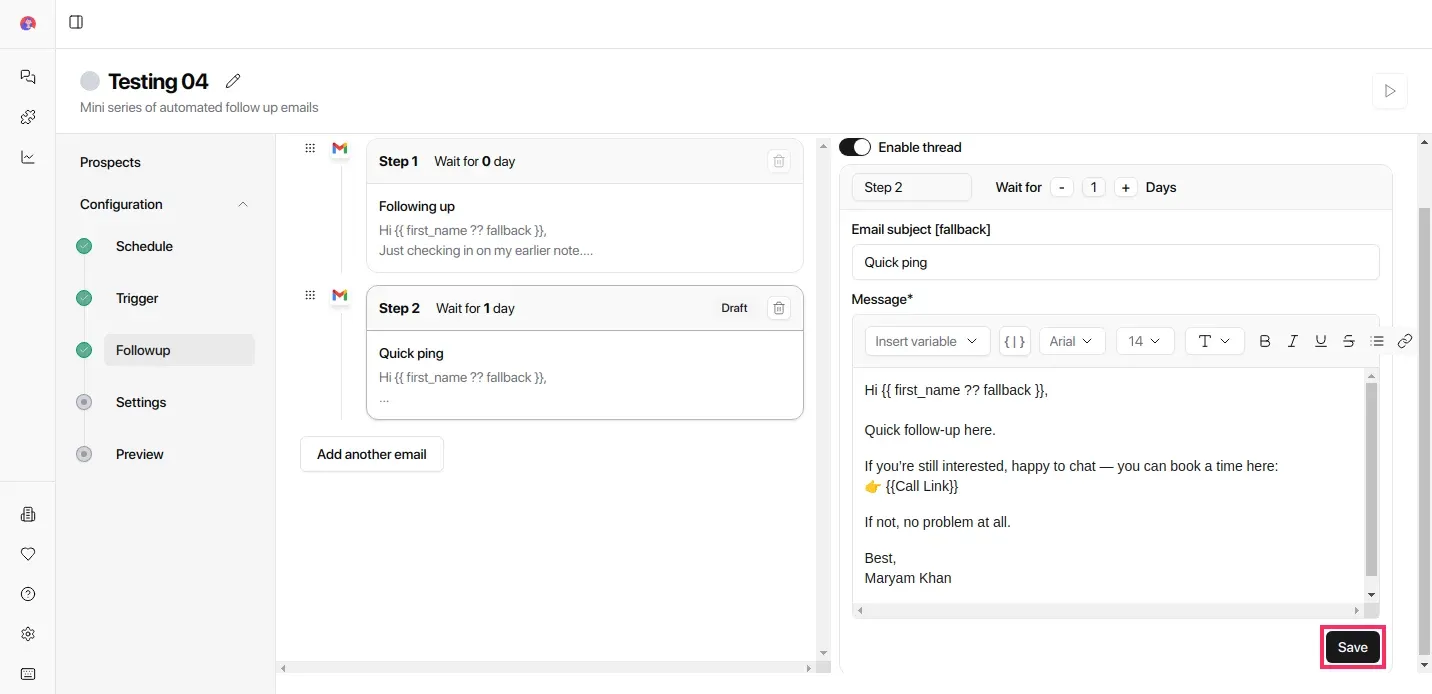
Configure the email thread content and edit the message to include:
Call links
Next steps
Context from the previous email
Save the email
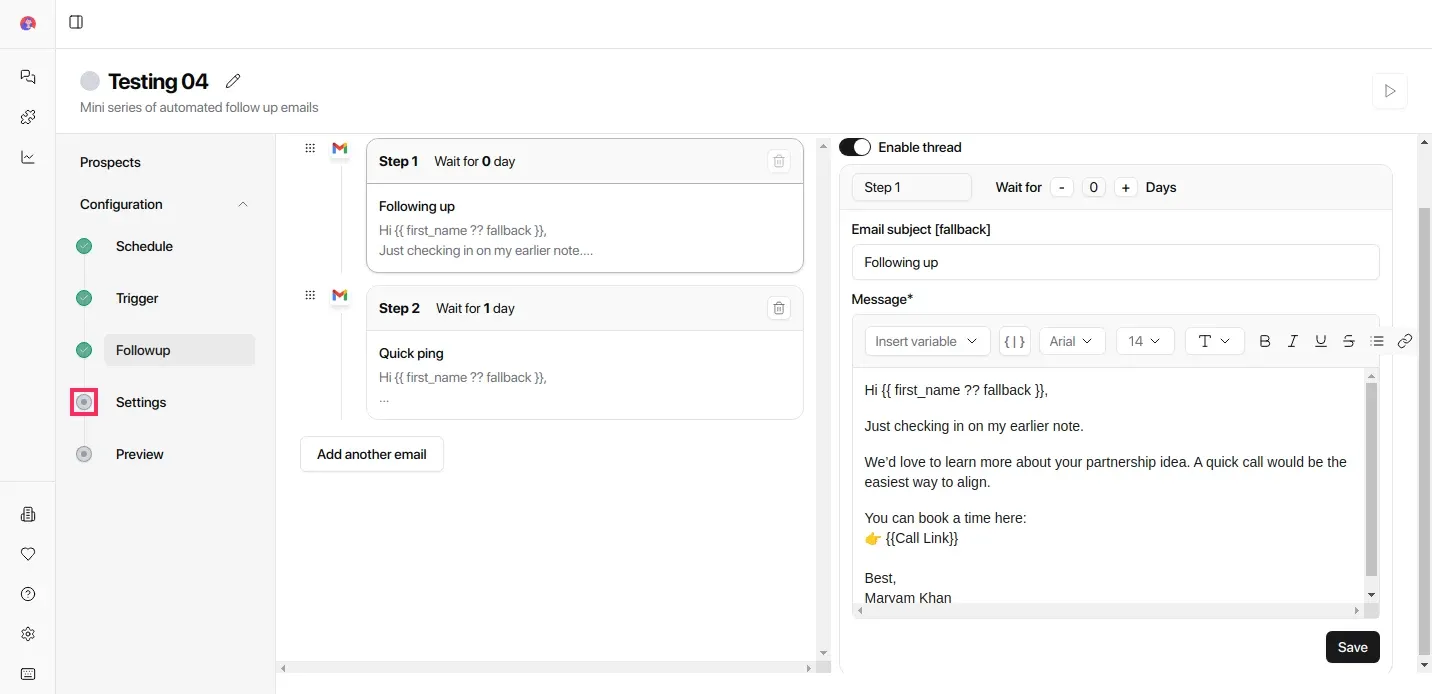
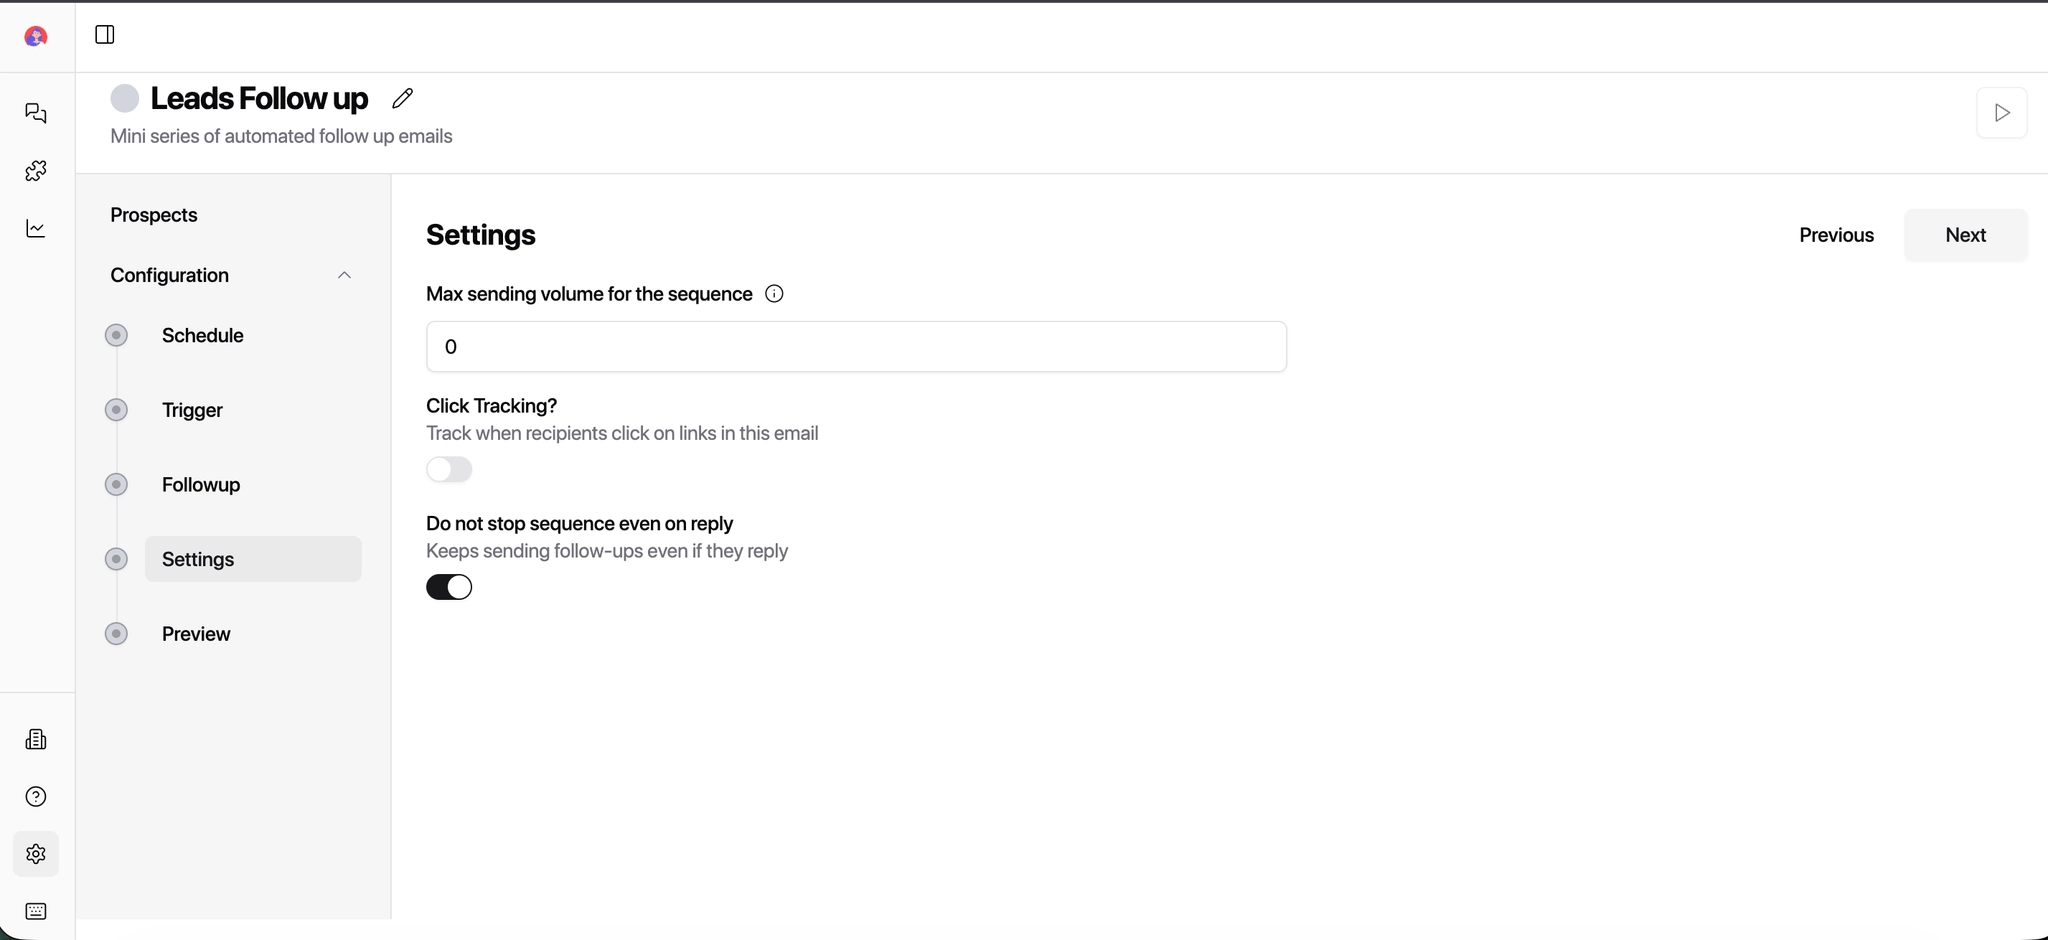
Click on the Settings
Set Max sending volume (e.g. 100 emails)
Enable Click Tracking (optional)
Choose if you want to stop the sequence even no reply
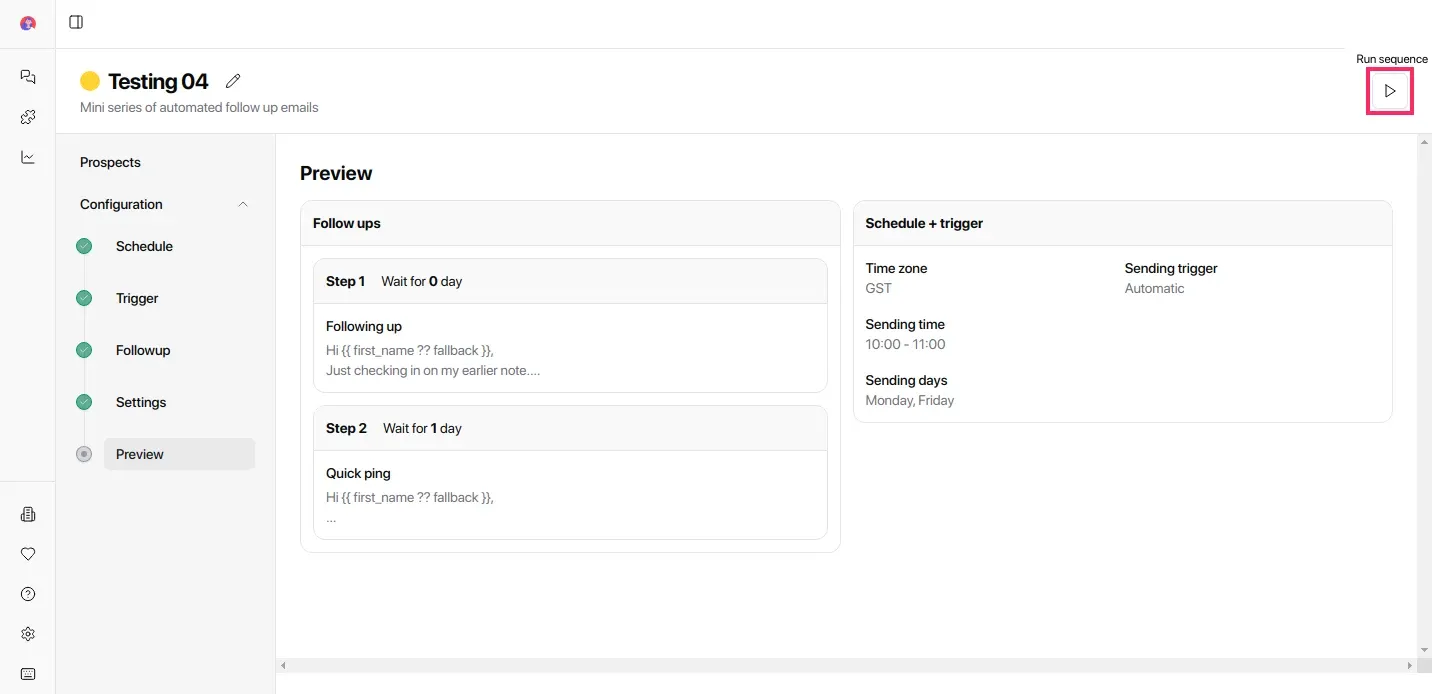
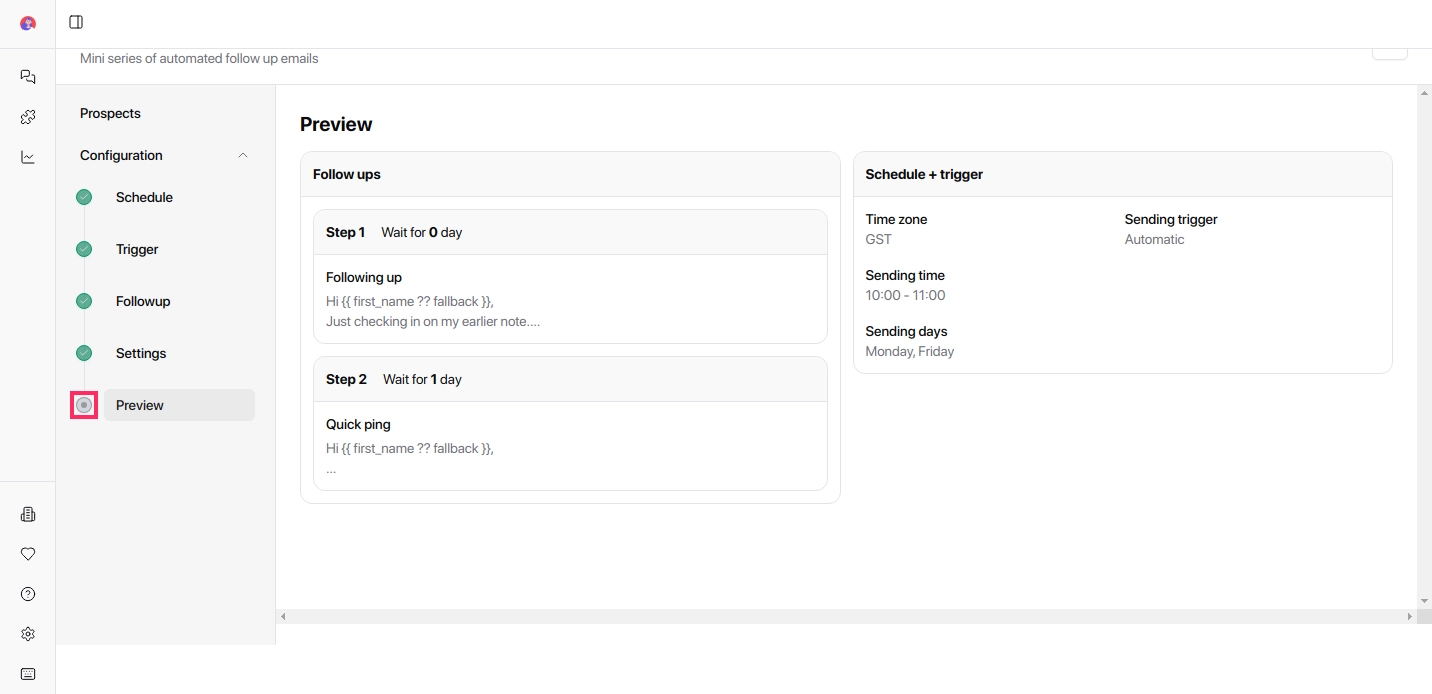
Open Preview from the left menu
Review:
Triggers
Schedule
Email content
Follow-up order
Click Run Sequence (top right)
Your follow-up sequence is now live. Emails will send automatically based on your trigger, schedule, and rules — no manual follow-up needed.