
Set Up Advanced Filter in a Workspace
What you'll learn
In this guide, you'll learn what filters are, how they differ from Lists and Labels, how to build filter conditions, and how to use filter views daily to prioritize replies without missing anything
What Are Advanced Filters (and Why They Matter)
Filters in Master Inbox are rule-based conditions that determine which conversations appear in the view.
Filters are an action layer.
They allow you to narrow down the conversations based on specific rules and attributes.
After setting up, filters help teams:
Prioritize hot leads
Avoid missing follow-ups
Separate signal from noise
Work faster without switching multiple tabs
Example of filters:
Labels
NOTspam/unwanted/casualReply since
less than7 days
They give structure to the replies.
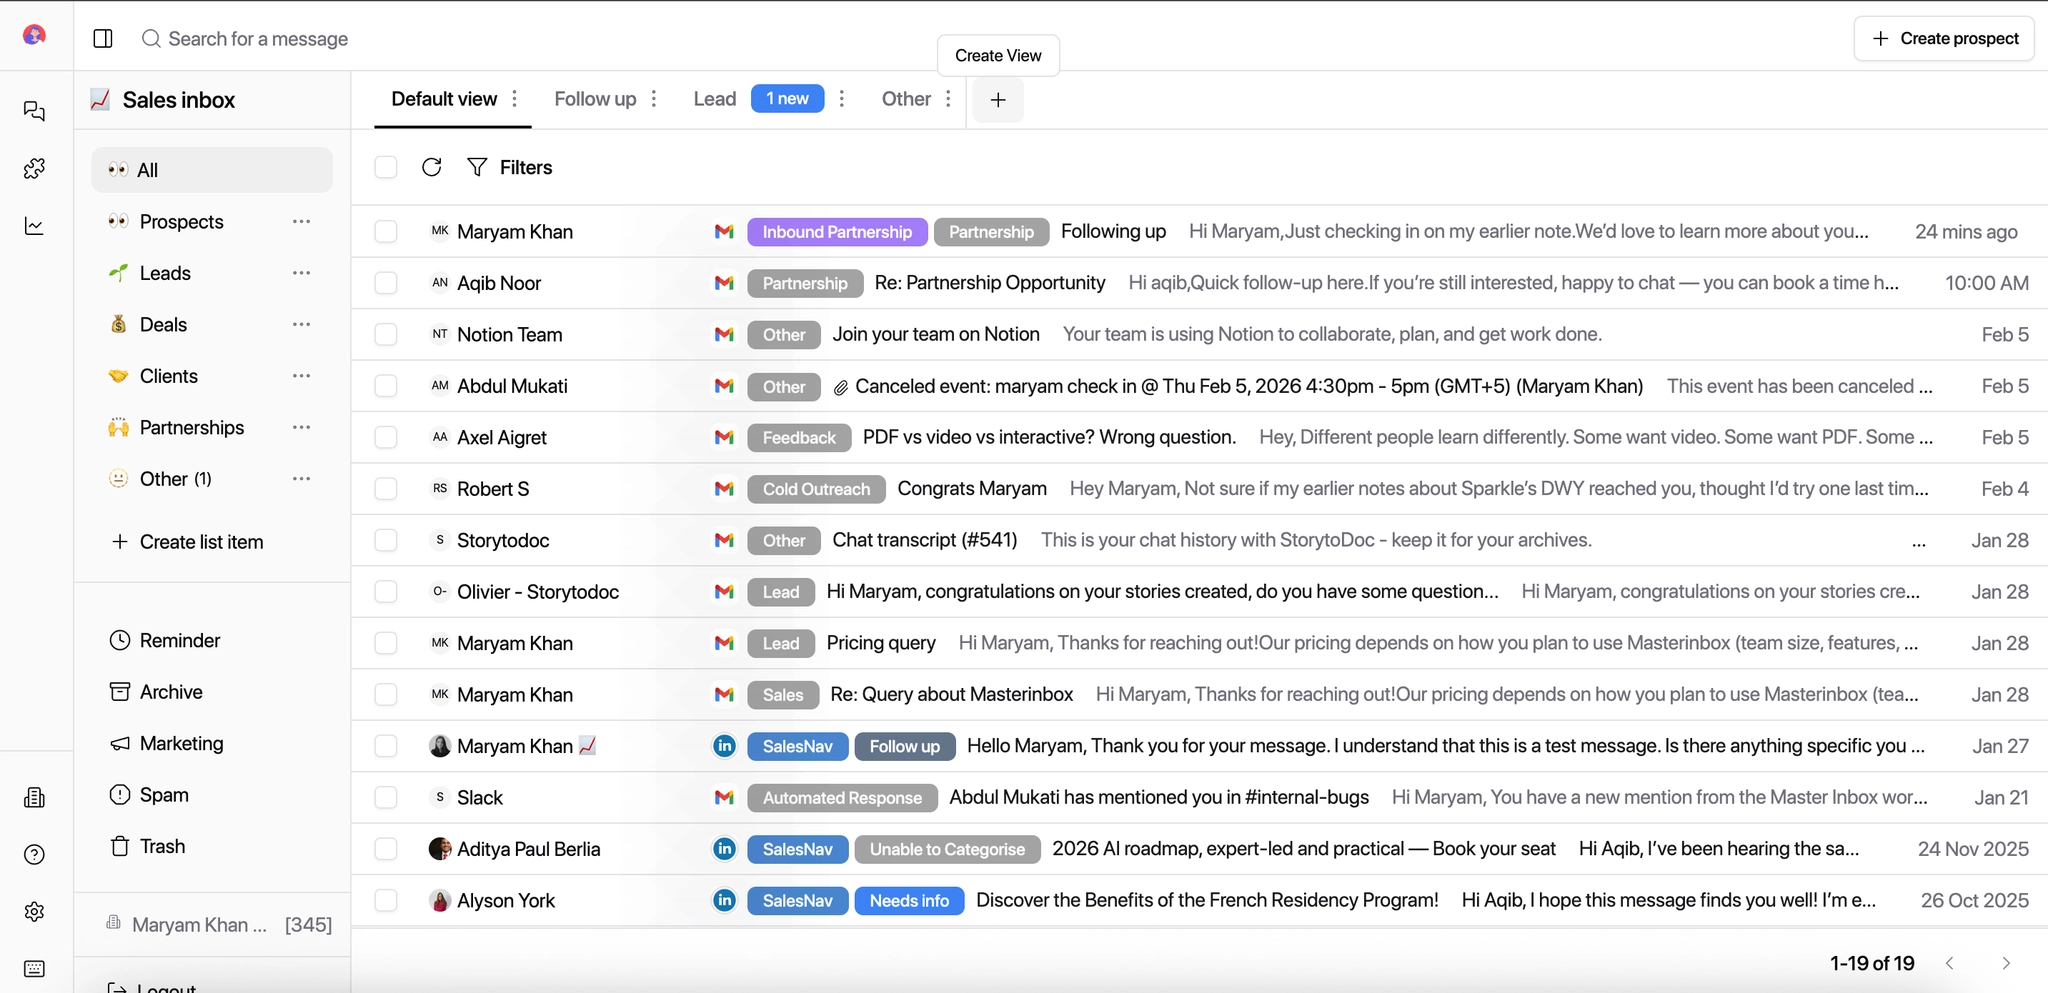
Lists, Labels, and Filter Views - What's the Difference?
MasterInbox uses List Items, Labels, and Filter Views, and each plays a different role.
Understanding this once will make the rest of the inbox intuitive.
List Item = What stage the conversation is in
List Items show where a reply sits in your pipeline.
Examples of Lists:
Lead
Deal
Client
Other
A conversation always belongs to a list.
The list reflects workflow progression.
Lists answer:
"What type of conversation is this?"
Label = Intent of the reply
Labels classify conversations.
They provide the structure that filters and views use.
You can customize, edit, copy, and delete labels in Master Inbox.
By displaying hot replies and removing manual sorting, they save a great deal of time.
Examples of labels:
Hot lead
Interested
Follow-Up
Not Interested
Client
Information request
Spam/Unwanted
Labels answer:
“What is the intent of the prospect or client?”
View = Dedicated Display
A view is a separate, dedicated display of conversations based on specific filter rules.
You can add multiple filters to a view.
It allows you to focus only on the responses that matter to you.
Examples of views:
High priority/high intent
Follow up
Casual
LinkedIn only
Each view creates a clean, separate lens so you can focus only on the replies that are high priority at the moment.
Example
Scenario 1: New Lead Reply
List: Lead
Labels: Interested
Create a view: High intent
Add filter: labels
EQUALSinterested👉 Next step: Reply quickly and qualify the lead in the high-intent view.
Scenario 2: Lead Asked for Time
List: Lead
Labels: Follow-up
Create a view: Follow-up later
Add filter: labels
EQUALSfollow-up👉 Next step: Set a reminder and reply at the right time.
Scenario 3: Existing Client Reply
List: Client
Labels: Client Question
Create view: Clients
Add filter: labels
EQUALSclient or listEQUALSclient👉 Next step: View all client conversations separately.
Scenario 4: Not a Sales Opportunity
List: Other
Labels: Not Interested / Informational
Create view: Unwanted
Add filter: labels
EQUALSunwanted/spam👉 Next step: Separate non-sales replies so high-intent prospects are easier to find.
Common Labels You Can Create for Filter Views
Here are recommended views you can create using these filter combinations.
View: high-intent
Labels
EQUALSinterested, hot leadLast message from
EQUALSprospectReply since prospect
less than14 days
View: follow-up later
Labels
EQUALSFollow-upReply since prospect
less than7 days
View: Casual chats
Labels
NOThot leads, interested, client
How Filter Views Help You Daily
At the top of your inbox, filter views help you instantly answer:
What needs my attention now?
What can wait?
What can be ignored?
What belongs to a client vs a lead?
Instead of scanning every reply, your inbox tells you exactly what to do next.
How to Set Up a Filter to a View
Filters help you organize replies and focus on what matters.
Steps to create a filter:
Click the ➕ (plus) icon on the top in the workspace.
Enter a filter name and create it.
Common Filter Labels:
Here are recommended labels you can use to build filters:
Interested
Follow-Up
Not Interested
Client Question
Internal / FYI
Warmup / Noise
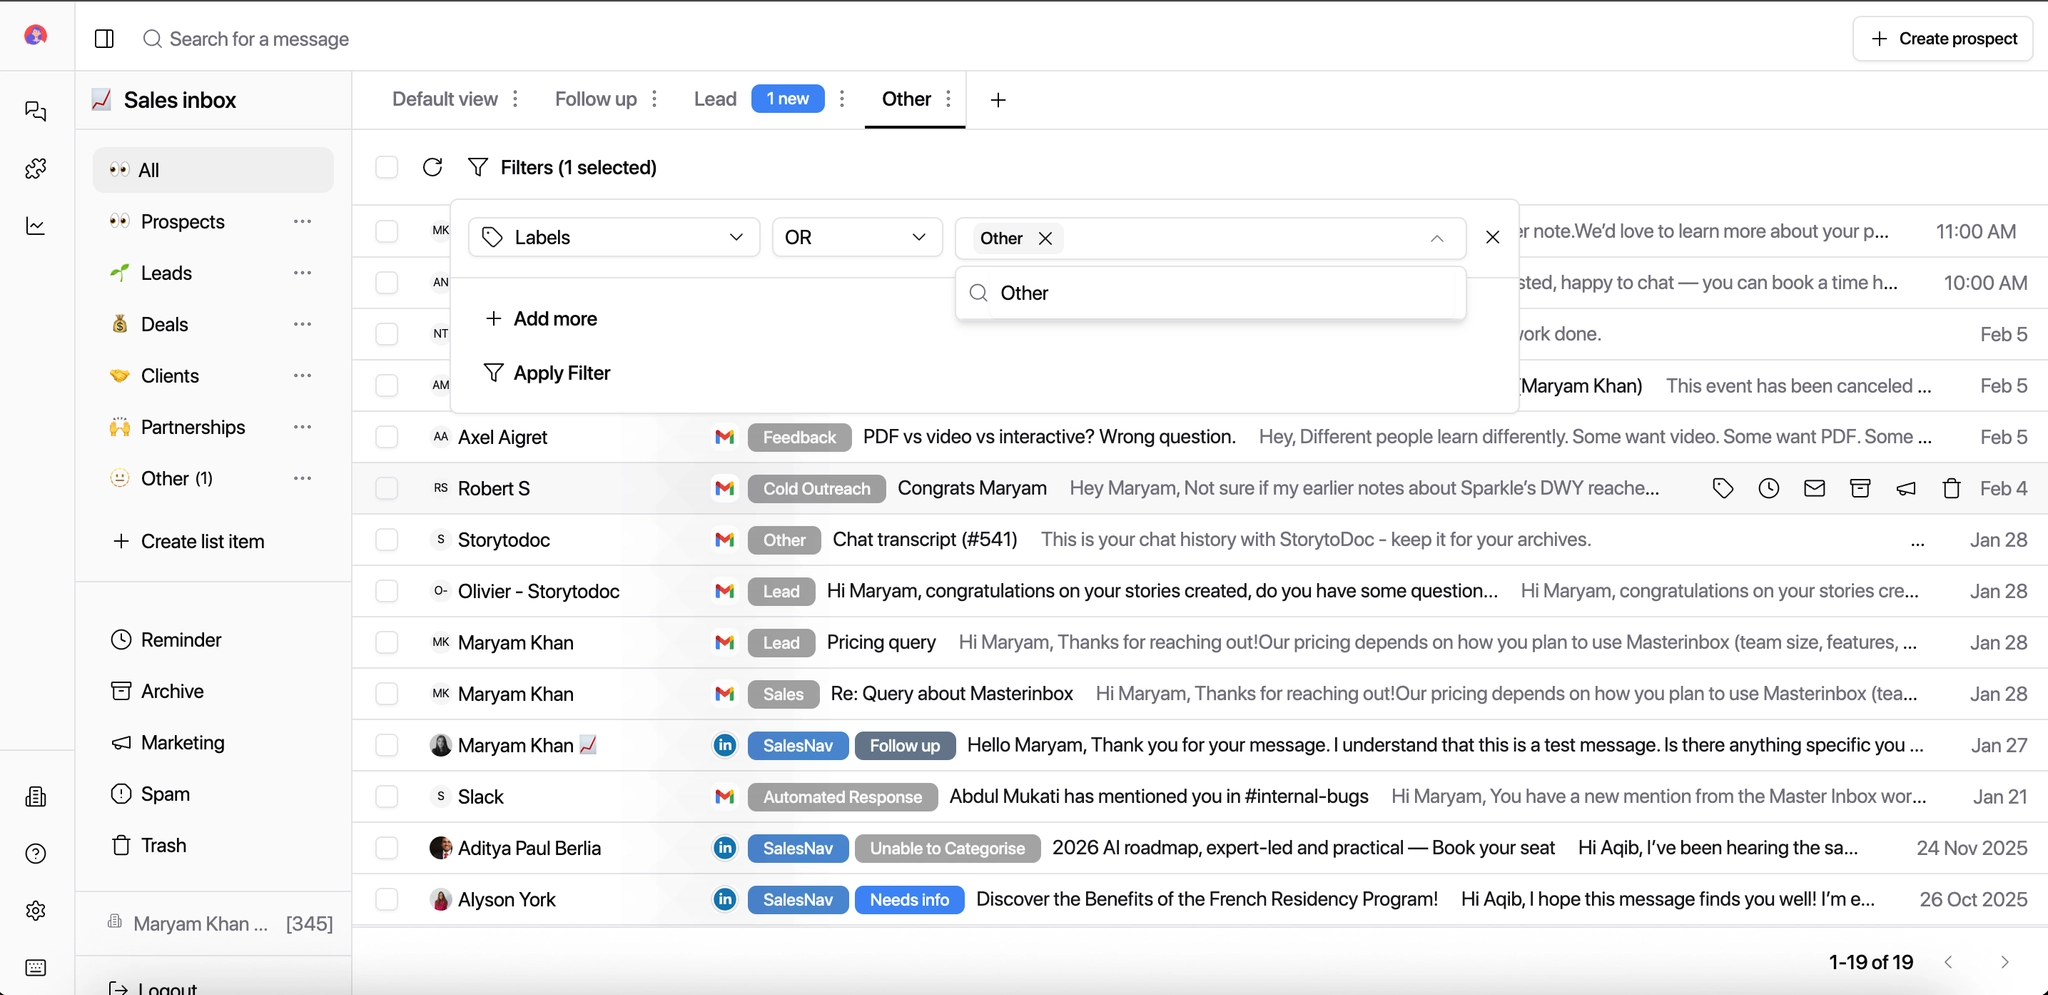
Select the filter in the view you just created.
Choose the values you want to filter.
Click Apply, and filters will be applied to the view.
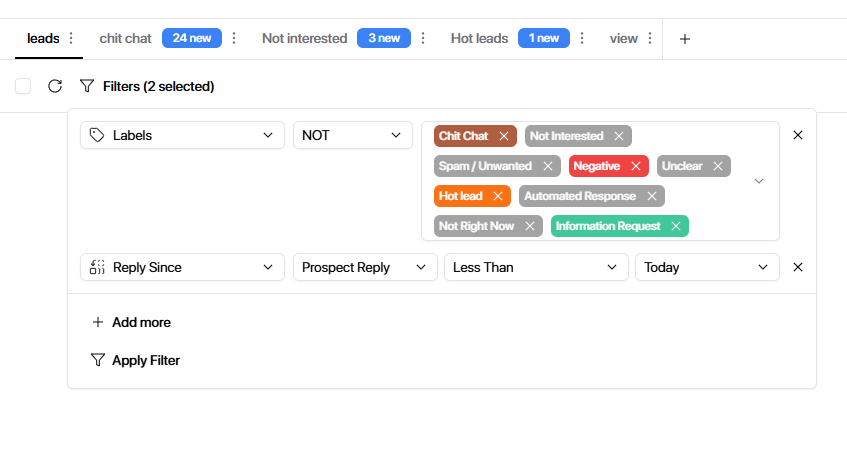
How Filter Conditions Work (with Examples)
Each filter is built using three parts:
1. What to filter by → 2. How to match it → 3. The value
1️⃣ Choose a Field (What you want to filter)
This tells Master Inbox what part of the message to look at.
Common fields you'll use most:
Label → Prospect intent (Interested, Follow Up, Not Now, etc.)
List → Stage of the conversation (Lead, Deal, Client, Other)
Channel → Email or LinkedIn
Campaign Name → Which outreach campaign the reply came from
Domain → Company email domain (e.g. @company.com)
Reply Since / Prospect Reply Since → Time-based filtering
Read Status → Read vs unread messages
Follow-up Count → How many times you've followed up
2️⃣ Choose a Condition (How it should match)
This defines how strict the filter should be.
Most-used conditions:
Equals → Exact match
Doesn't equal → Exclude something
Contains → Partial match
Doesn't contain → Remove noise
Starts with / Ends with → Useful for subjects or domains
OR → Match either condition
NOT → Exclude specific cases
3️⃣ Enter a Value (What you're looking for)
This is where you define the actual rule.
Examples you can follow:
Example 1: Hot leads to reply first
Field: Label
Condition: Equals
Value: Interested
👉 Shows only prospects who showed buying intent.
Example 2: Client conversations
Field: List
Condition: Equals
Value: Client
👉 Helps separate client replies from outbound leads.
Example 3: LinkedIn replies only
Field: Channel
Condition: Equals
Value: LinkedIn
👉 Useful for BDRs handling LinkedIn inbox separately.
Example 4: Replies from last 24 hours
Field: Prospect Reply Since
Condition: Equals
Value: Last 24 hours
👉 Ensures no fresh replies are missed.
Example 5: Exclude warmup or noise
Field: Subject
Condition: Contains
Value: warmup
👉 Keeps real leads visible.
Example 6: Exclude multiple lists with one operator
Instead of adding multiple "Does Not Equals" rows, use NOT once and select all the lists you want to exclude.Field: Lists
Condition: NOT
Value: Not Interested, Follow Up, etc.
Save the filter.
You can add more than 1 filter.
Once saved, your filter automatically groups every message that matches your rules. Your inbox now tells you exactly what to do next — no manual scanning, no missed replies.