
How to Add a Channel & Auto CC/BCC
What you'll learn
In this guide, you'll learn how to add channels to your workspace, connect different sender types, bulk upload mailboxes as an agency, and set up Auto CC/BCC rules.
What is a Channel
A connected sending account (email or LinkedIn) that allows Master Inbox to send, receive, and manage conversations from that identity.
It represents who messages are sent from.
It’s not just “for replies.” It’s the actual communication account you connect.
Steps to add a channel
Go to the Workspace section.
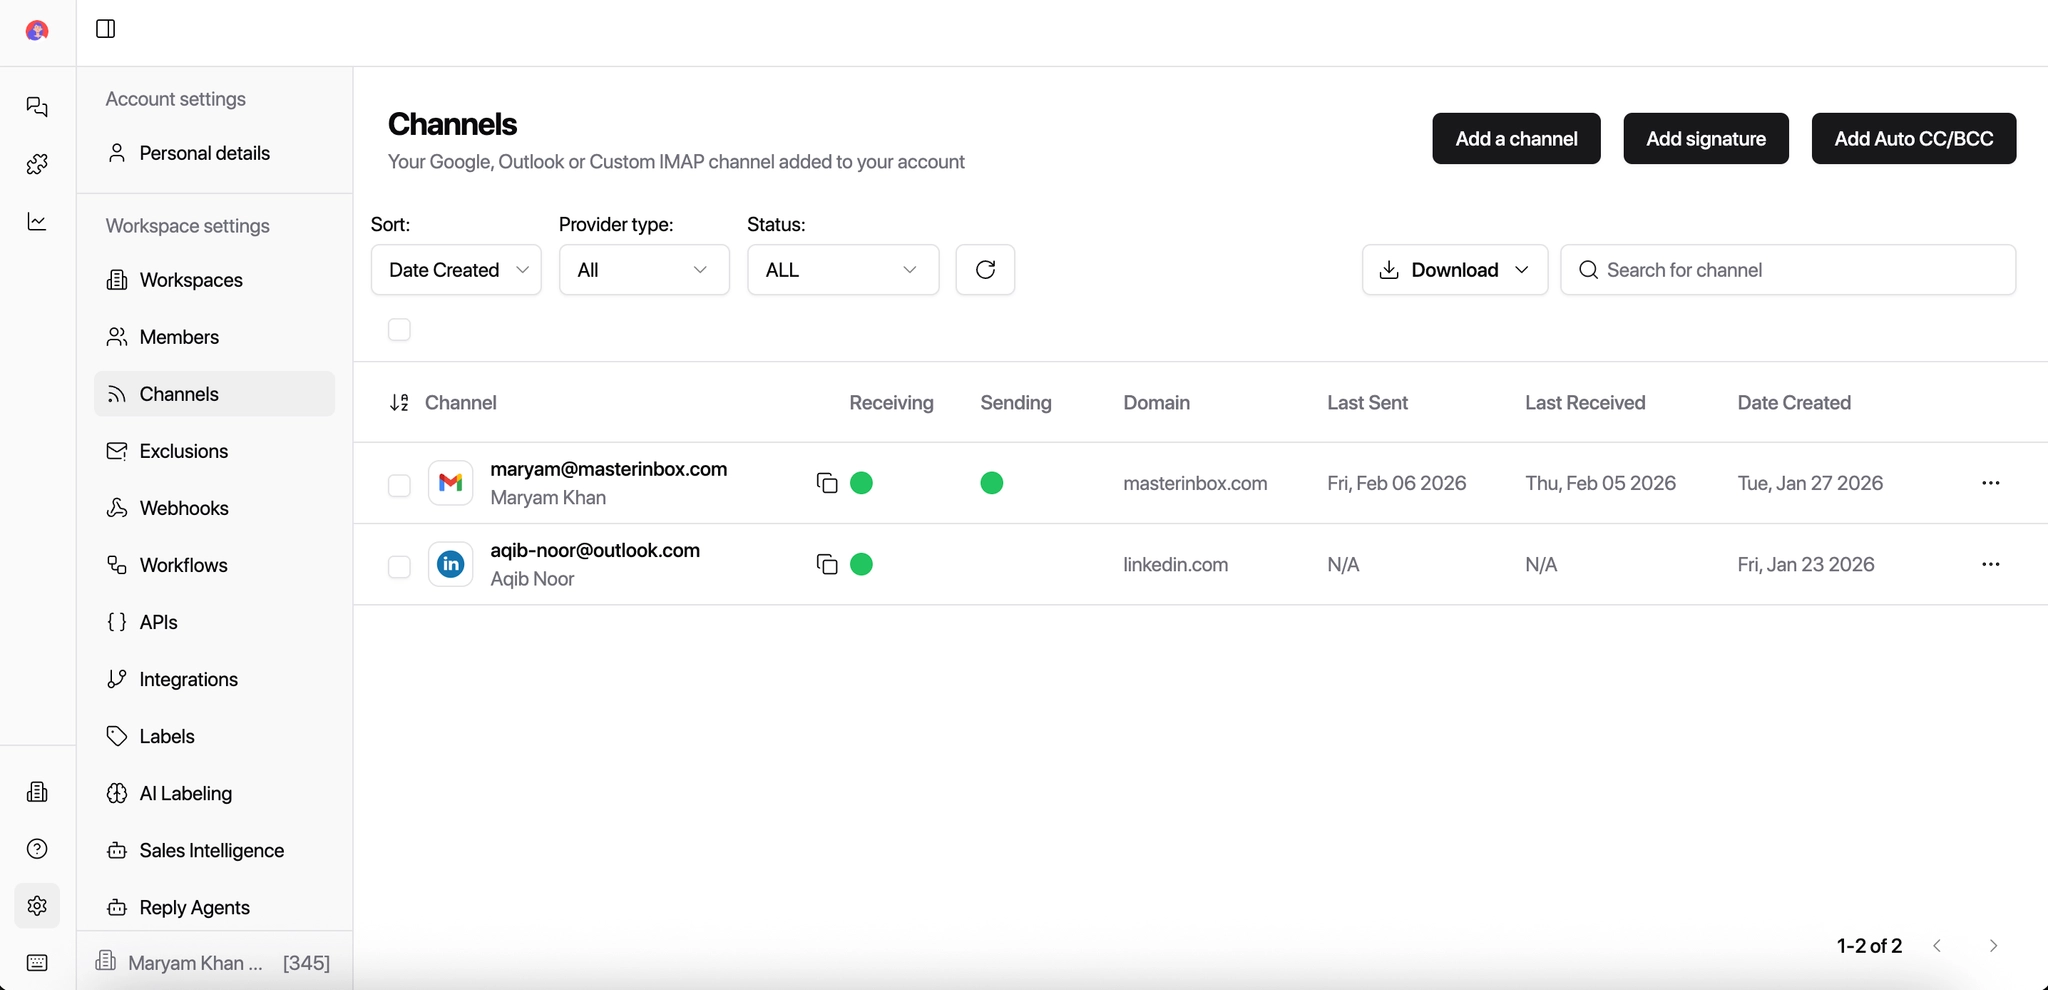
Click on the Channels tab.
Select Add Channel.
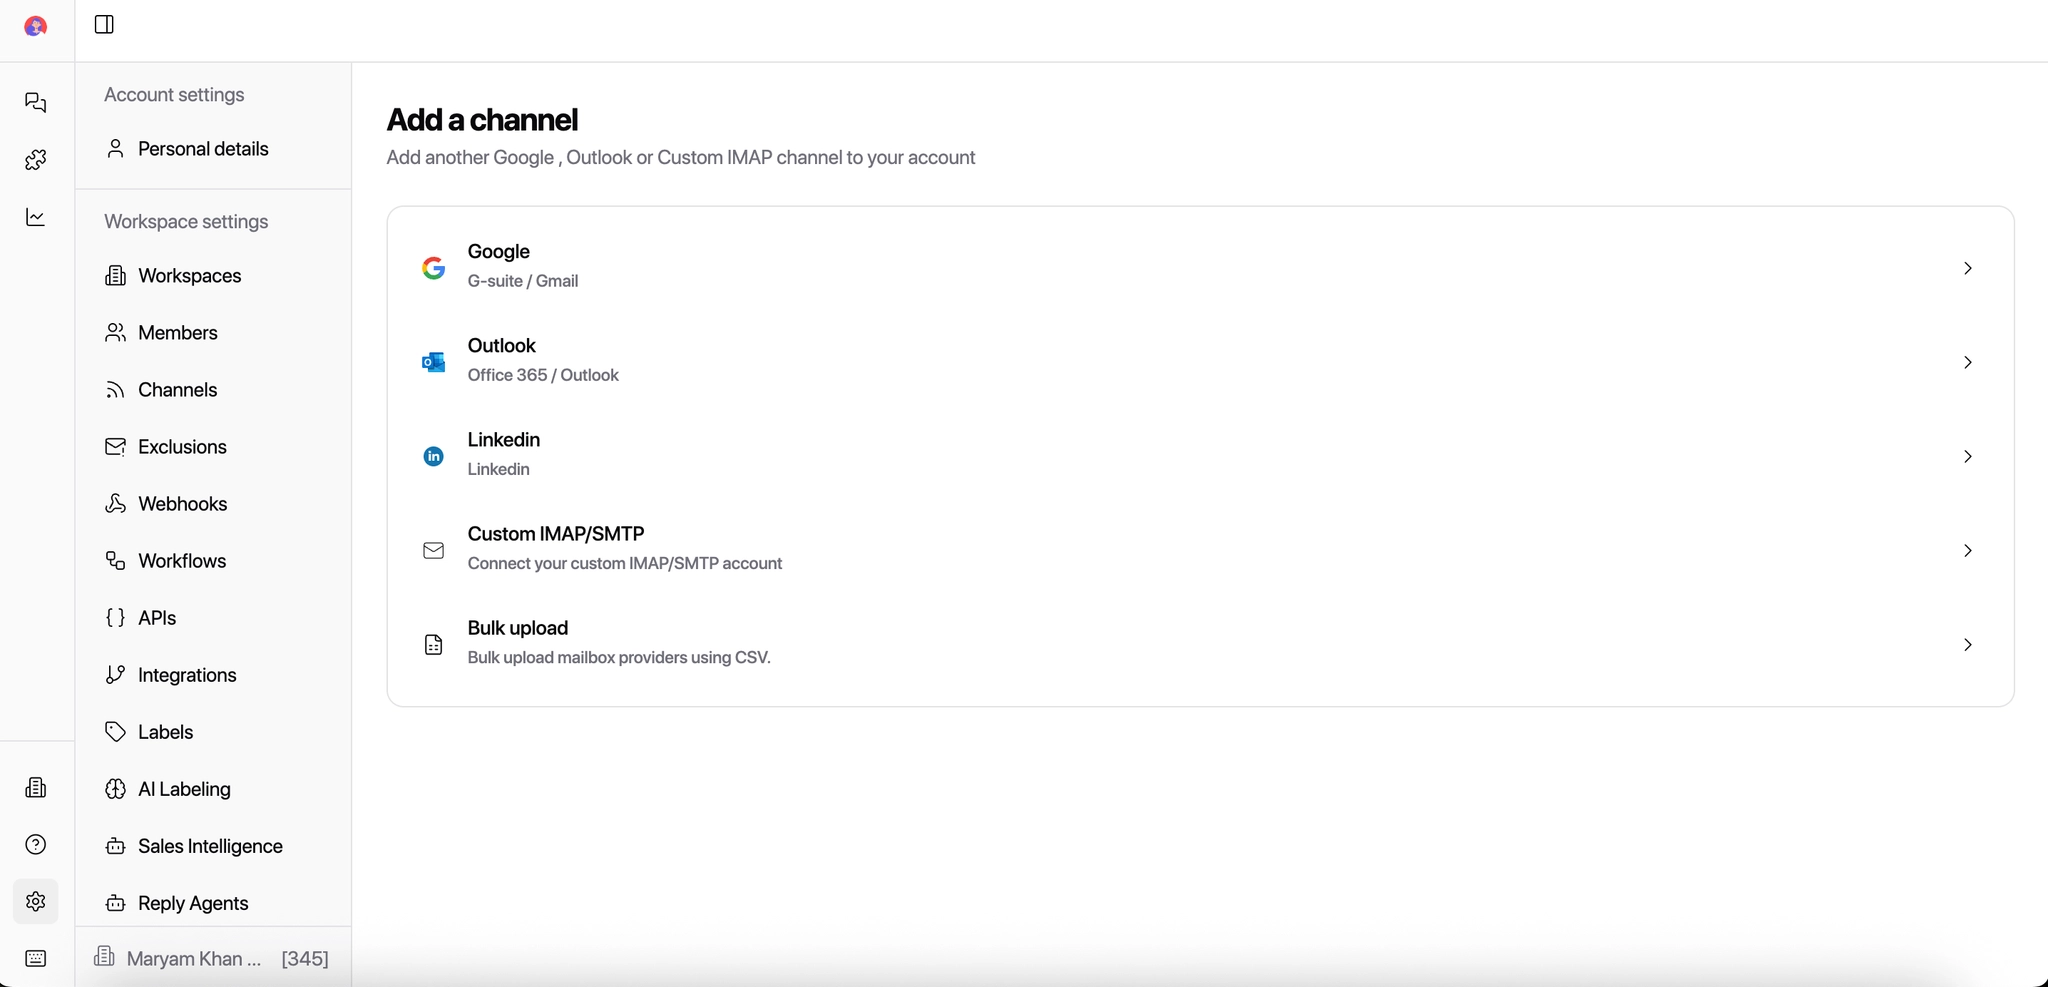
Choose the channel type.
Channel Type You Can Add
Master Inbox supports multiple channel types, all unified into a single conversation view.
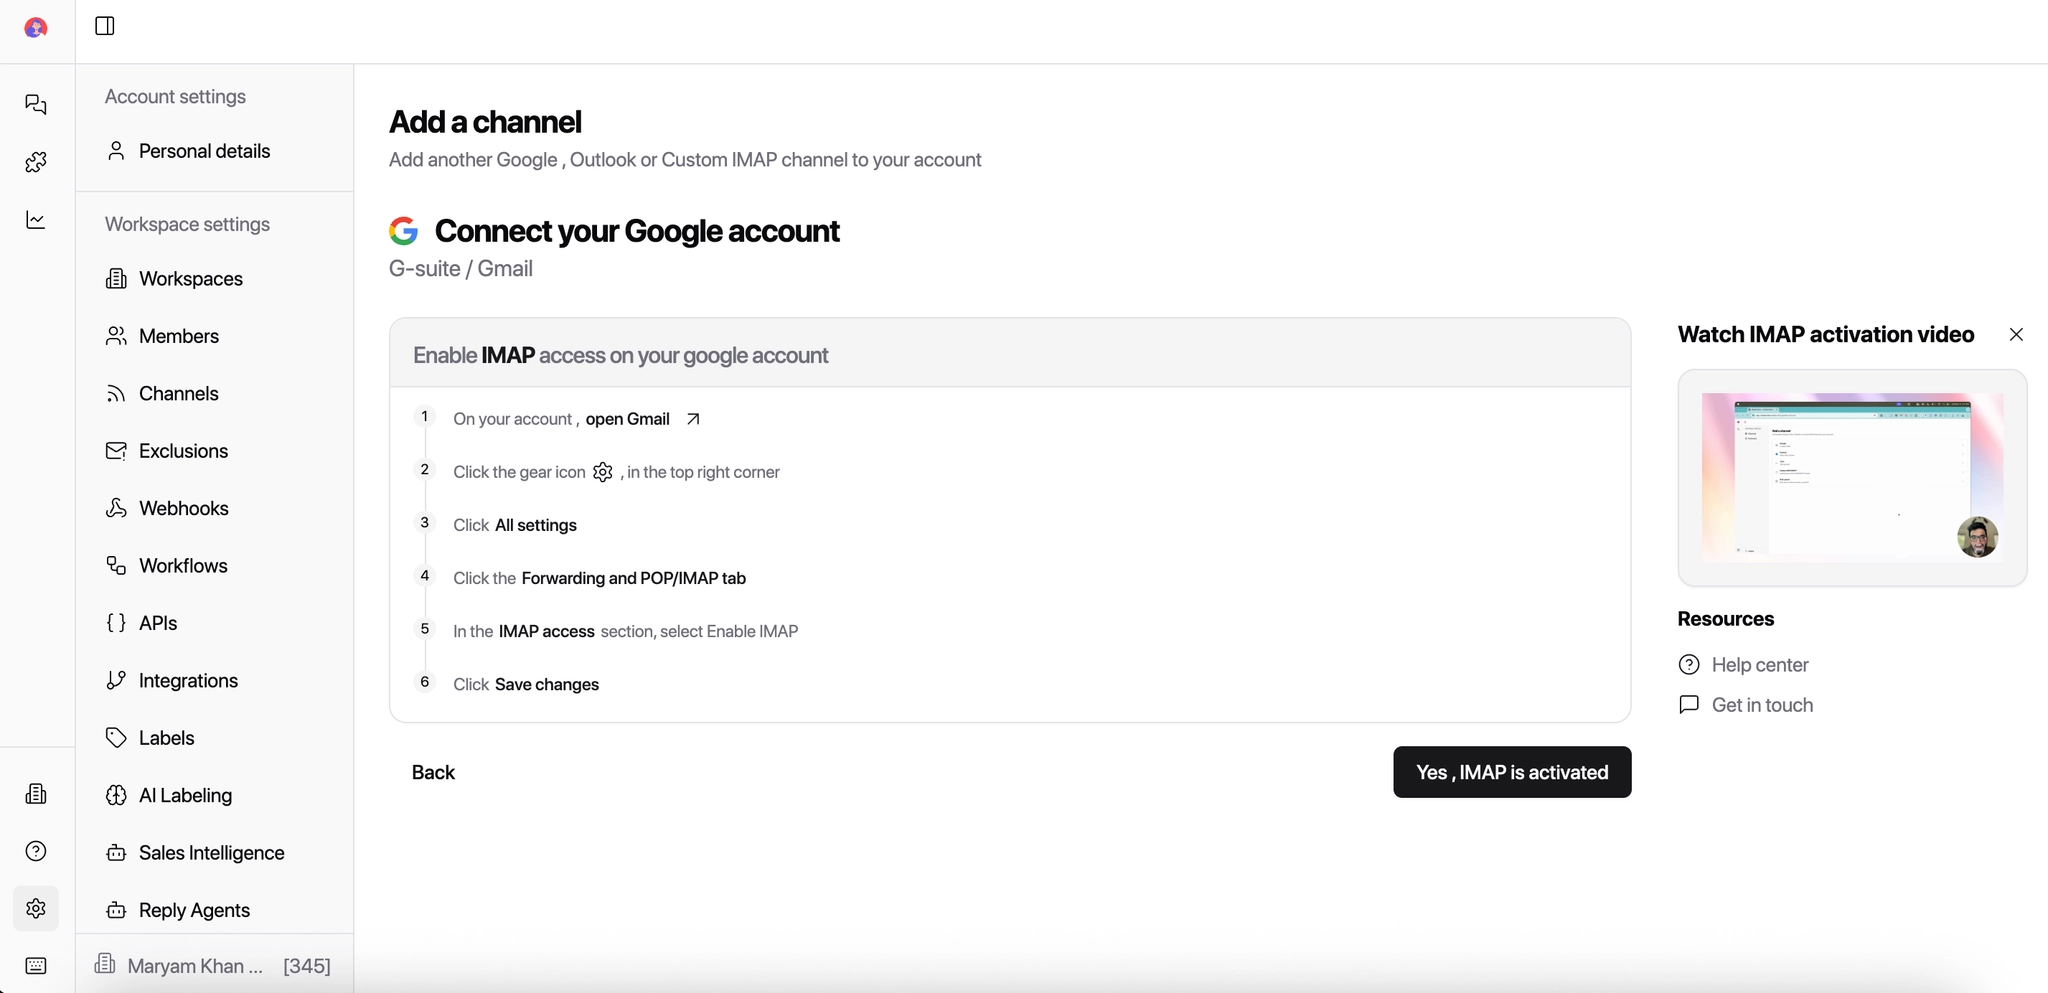
Google (Gmail/G-Suite)
Connect Gmail or Google workspace accounts to read and send replies automatically.
Outlook (Office 365)
Connect Microsoft Outlook or Office 365 to sync replies in real time
Connect your LinkedIn account by adding your credentials directly.
Connect your LinkedIn account by adding your credentials
Custom IMAP/SMTP
Connect any custom email provider. Required for Zoho, GoDaddy, Namecheap, and private mail servers.
LinkedIn in MasterInbox works differently from tools like HeyReach or Lemlist. MasterInbox connects to real, direct LinkedIn conversations—not campaign-based inboxes.
What this means:
Messages come directly from real LinkedIn accounts
Conversations are 1:1 connections on LinkedIn
Replies sync exactly as they appear on LinkedIn
No automation or sequencing layer is used for LinkedIn
It connects and syncs via a secure third-party LinkedIn API
Master Inbox uses a secure third-party LinkedIn API to connect and sync these conversations.

How Email Connections Work
IMAP Reads incoming replies so Master Inbox can detect and sync messages into your workspace.
SMTP Sends outgoing replies when you respond directly from Master Inbox.
If a channel disconnects, incoming replies may stop syncing — which can result in missed leads or delayed responses. Check your channel status regularly.
What Happens If a Channel Disconnects?
Incoming replies may stop syncing
This can result in missed leads or delayed responses.
Bulk Uploading Mailboxes
This is for agencies managing multiple clients or 10+ mailboxes. Bulk integration lets you connect multiple sender accounts at once instead of adding them one by one.
This is especially useful when you:
Manage multiple clients
Onboard new campaigns frequently
Handle 10+ mailboxes or LinkedIn accounts
Want consistent labeling and permissions across accounts
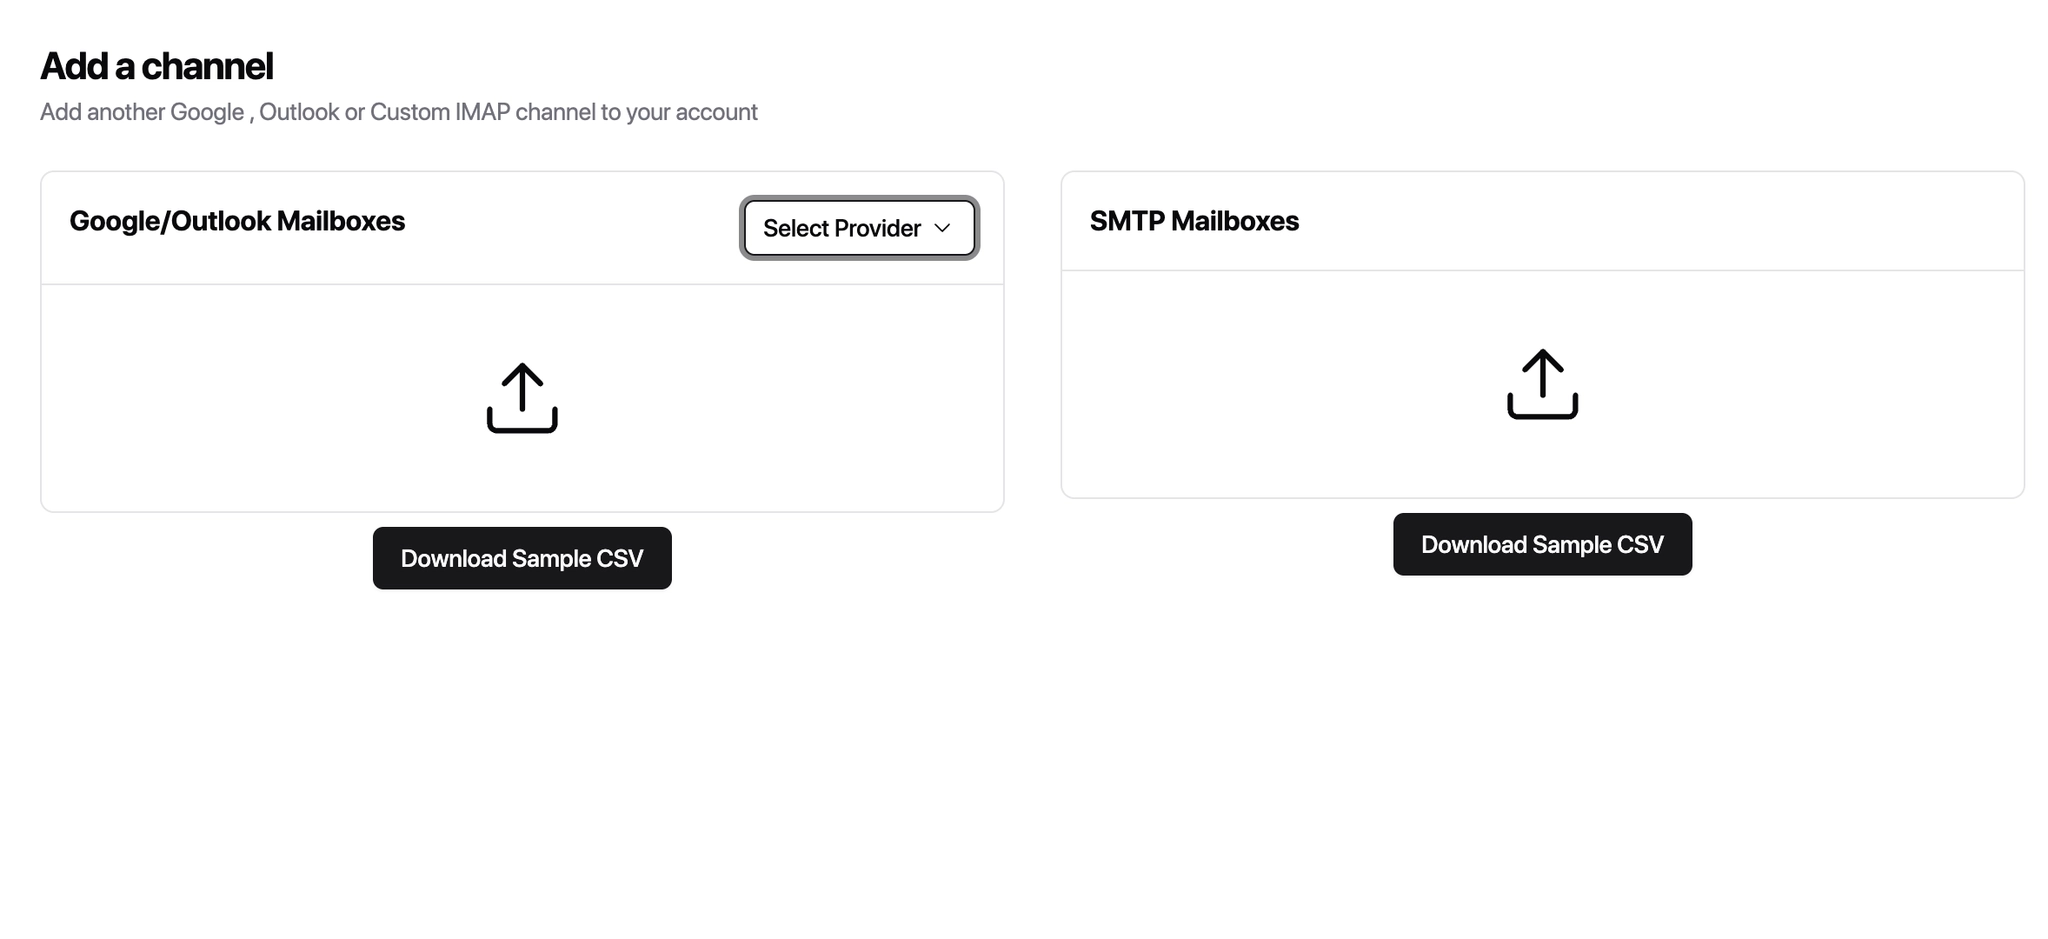
Steps to bulk upload:
How to Bulk Upload Mailboxes
Steps:
Choose the correct provider
When bulk uploading Google or Outlook mailboxes, select the provider:
Hypertide – Outlook
This provider supports both Google and Outlook mailboxes during bulk import.
Download the sample CSV
Download the sample CSV file for the type of mailboxes you’re adding:
Google / Outlook Mailboxes
SMTP Mailboxes
Each sample CSV includes:
The required column structure
The correct formatting for each field
Fill in the CSV (do not change the format)
Enter your mailbox details exactly in the same format as the sample file.
Important guidelines:
Do not rename columns
Do not add extra columns
One row = one sender mailbox
Double-check passwords and credentials
Ensure 2FA is disabled where required
Upload the completed CSV
Once your CSV is ready:
Upload the file in the bulk import section
Start the import
Wait for the system to validate and connect the mailboxes
Any errors will be shown so you can fix them before retrying.
Agency best practices:
Upload mailboxes client by client to avoid mix-ups
Use naming conventions in your CSV for easier tracking
Test with 2–3 mailboxes first before uploading at scale
Assign labels and permissions after a successful import
Connect it using the required credentials.
Once connected, the channel will start syncing replies into the workspace automatically.
How to Add Auto CC/BCC
Auto CC/BCC automatically adds specific email addresses to every outgoing reply from selected channels — without you having to manually CC anyone.
This is useful when you want to:
Keep clients in the loop on conversations
Loop in account managers or team leads
Maintain visibility without manual CC’ing every time
Log conversations in shared inboxes or CRMs
Once set up, you don’t need to remember to CC or BCC anyone - it happens automatically.
Steps to Add Auto CC / BCC
Go to Settings → Auto CC / BCC.
Click Add Auto CC / BCC.
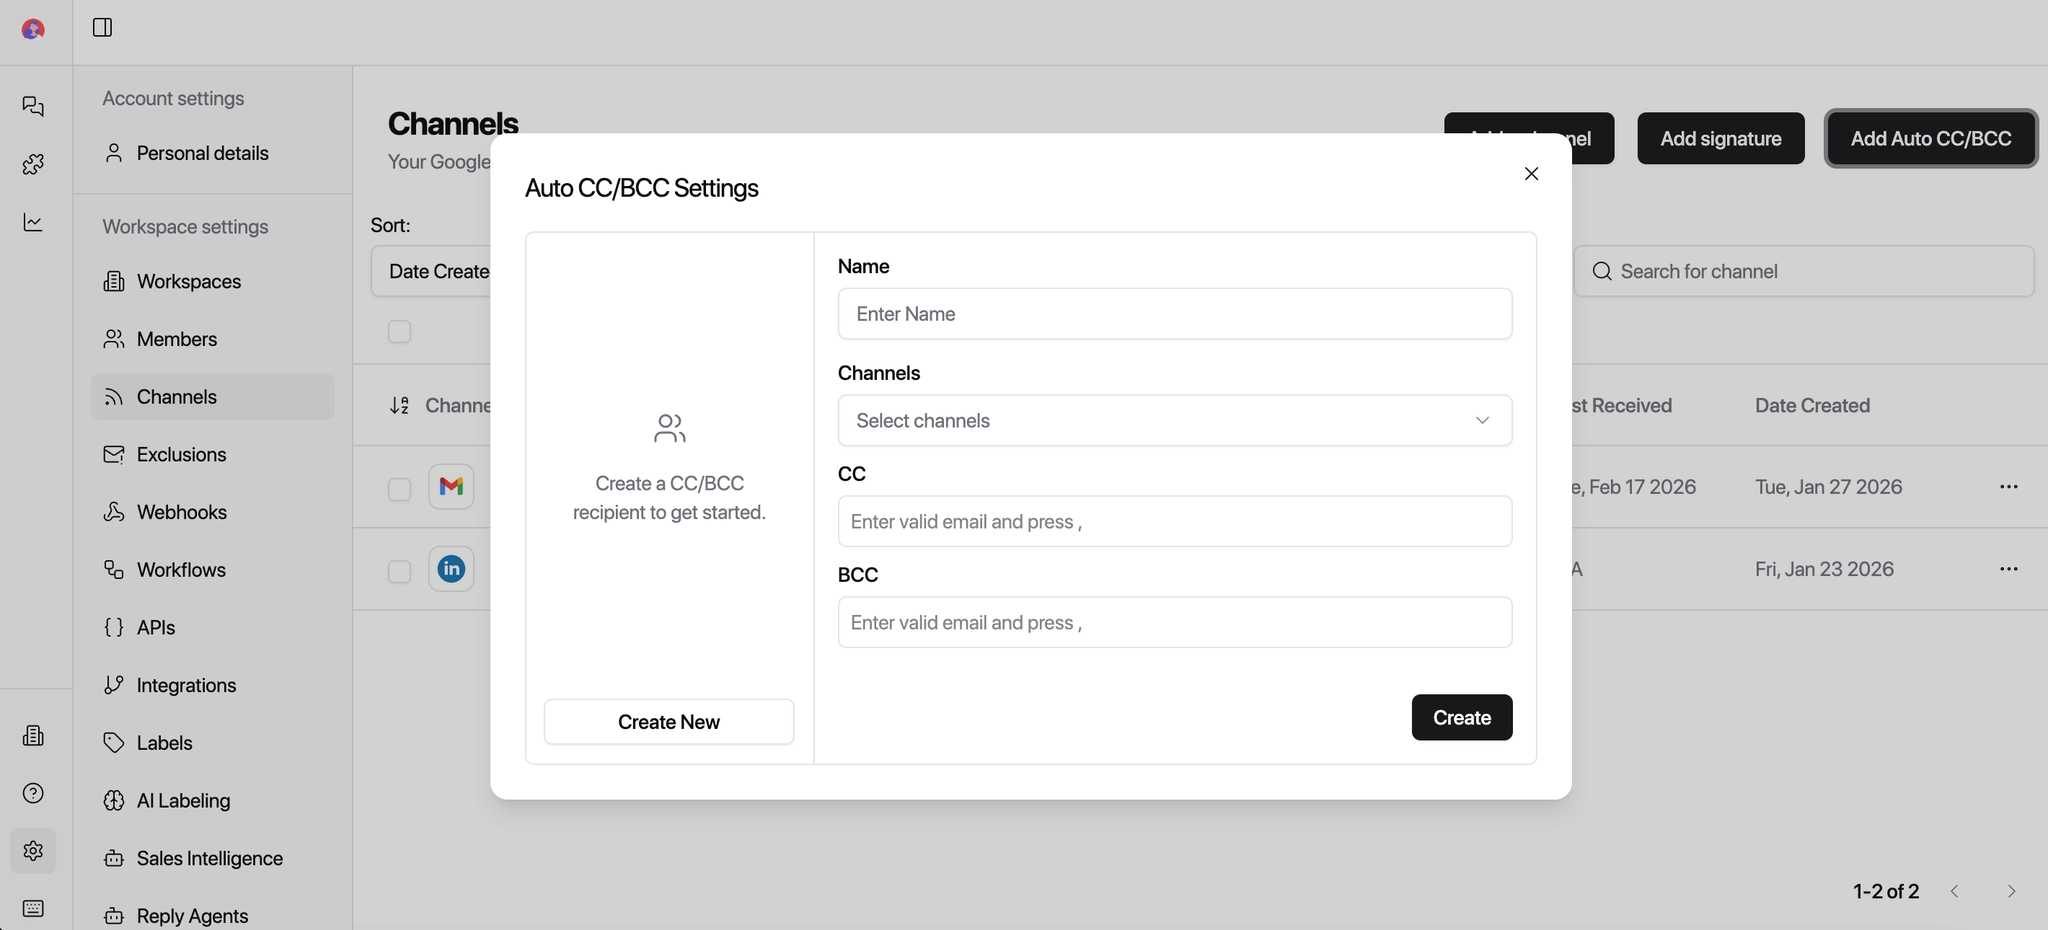
Enter a name for this rule
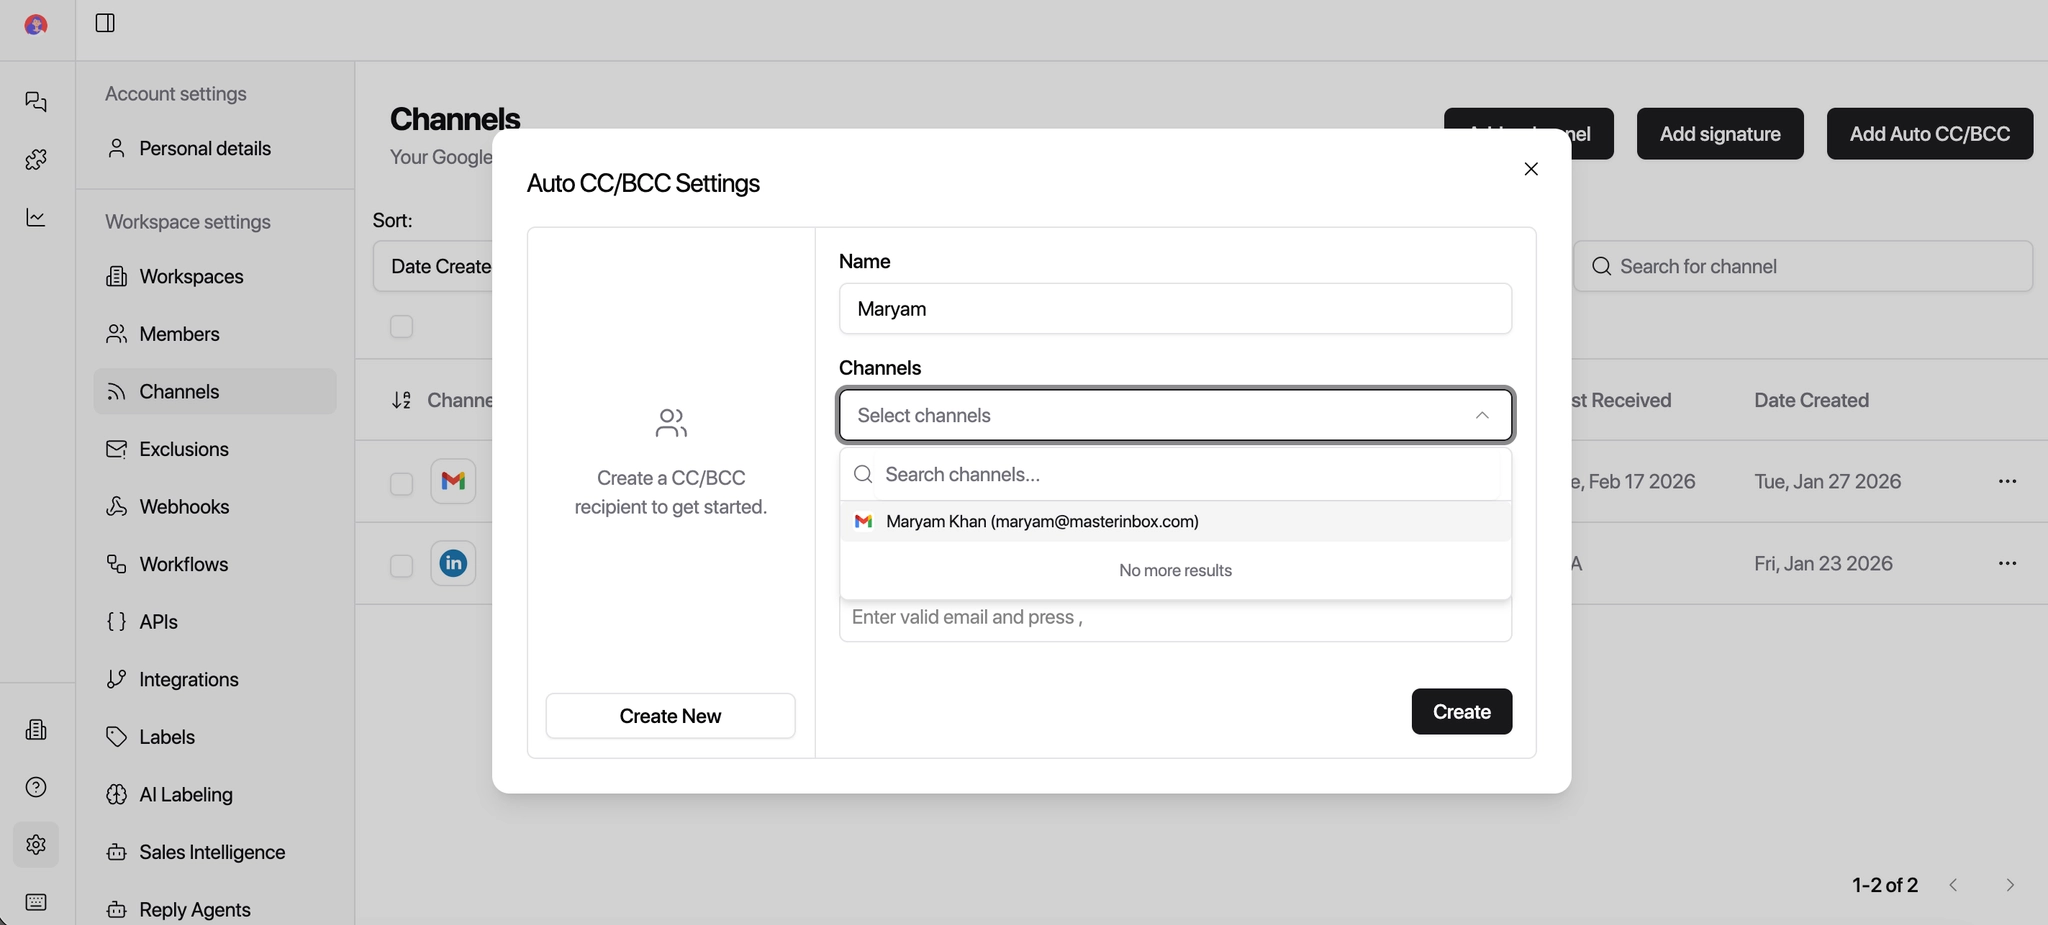
(e.g. "Client Visibility" or "Internal Team CC").Select the channels where this rule should apply
(Google, Outlook, or specific inboxes).
Add the email addresses you want to:
CC (visible to recipients)
BCC (hidden from recipients)
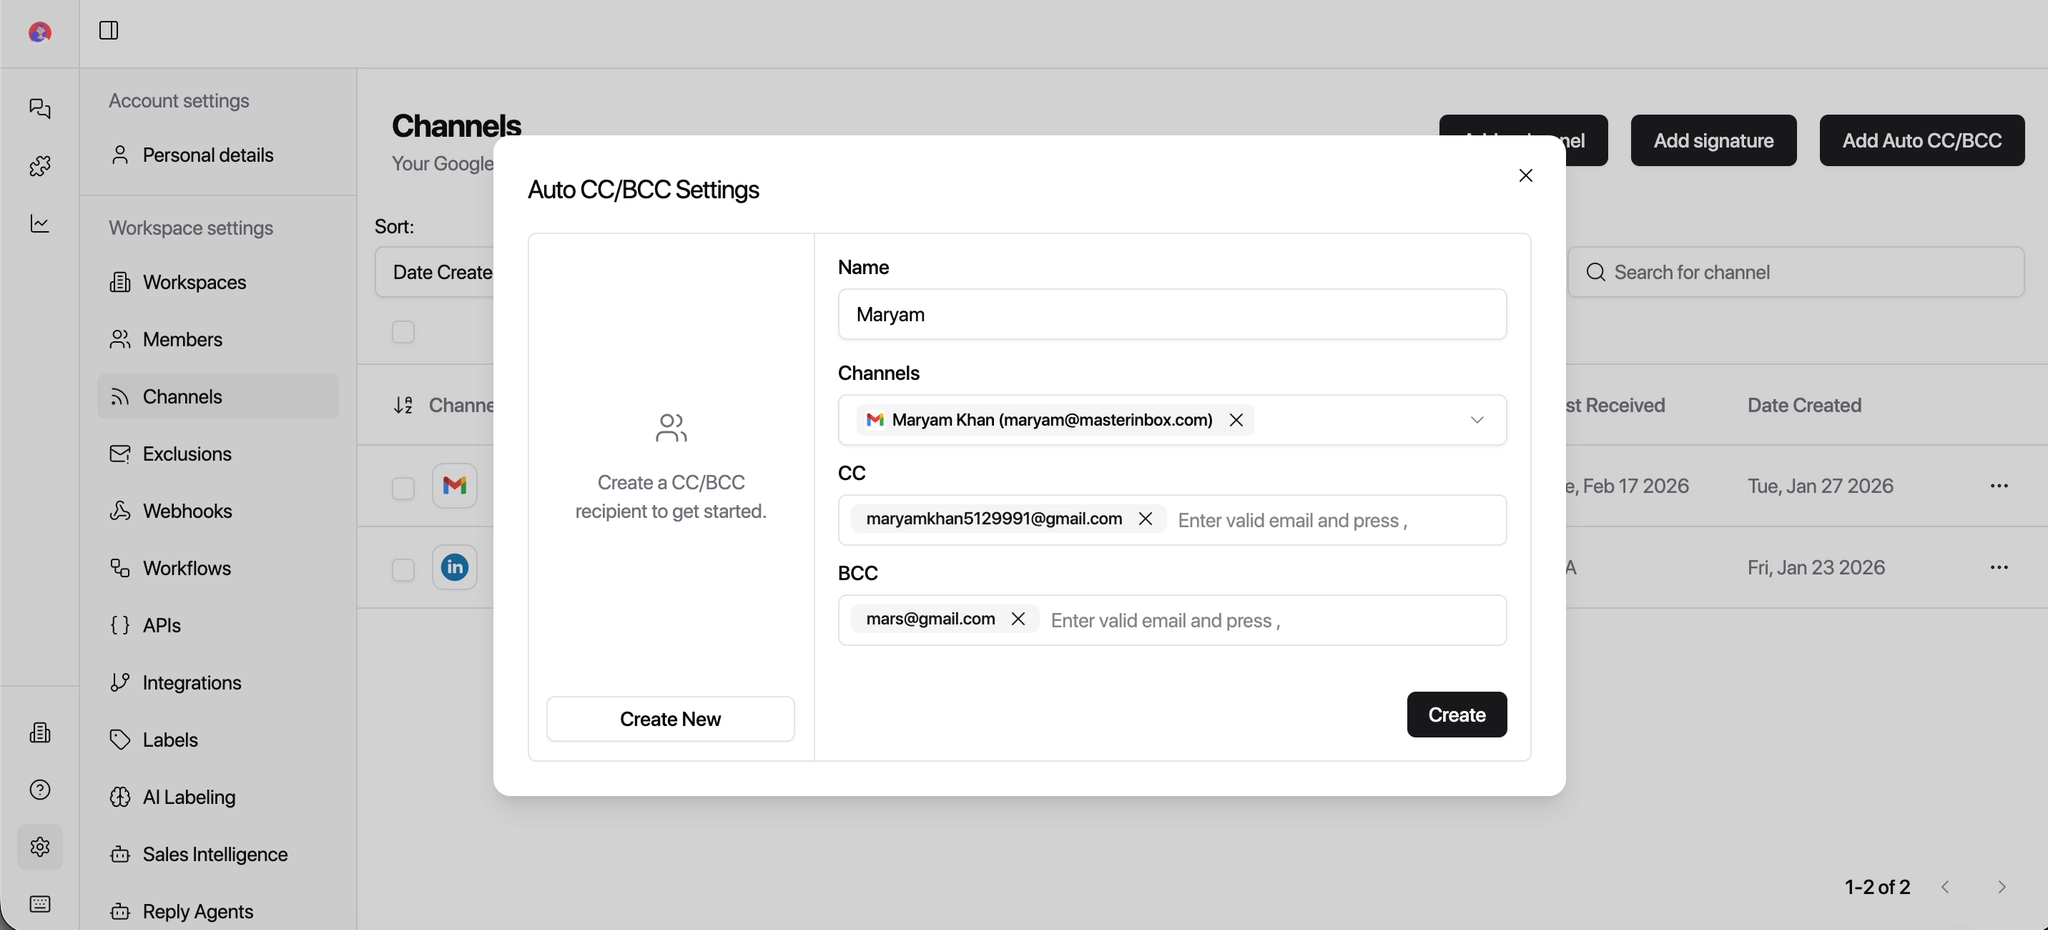
Save the configuration.
That's it! All outgoing replies from the selected channels will now automatically include these emails.